
A Guide to Using Neutral Density Filters for Landscape Photography

- What is a Neutral Density Filter?
- How Can a Neutral Density Filter be Used in Landscape Photography?
- Slowing the Shutter Speed with an ND Filter
- Using a Wider Aperture in a Bright Environment
- Different Types of Neutral Density Filters
- Screw-on Neutral Density Filters
- Square or Rectangular Neutral Density Filters
- What Do the Numbers on ND Filters Mean?
- Examples of Using a Neutral Density Filter
- Other Types of Neutral Density Filters
- Graduated Neutral Density Filter
- Variable Neutral Density Filter
- Polarising Filter
- Recommended ND Filters for Landscape Photography in Iceland

If you’ve been browsing landscape photos of Iceland, then it’s very likely that you’ll have seen some incredibly fascinating scenes, from silky waterfalls to drawn-out clouds and even mirror-like glacier lagoons. You’ve probably also been wondering how to achieve the same effect with your own camera equipment. Is it all post-processing or has something been done in-camera to create these stunning photos that you’ve been seeing?
- See the Complete Travel Photography Guide to Seljalandsfoss Waterfall
- Learn about Hard vs Soft Graduated Neutral Density Filters for Landscape Photography
The secret to these effects in landscape photography lies in neutral density filters. While the effects may seem a little extraordinary and mysterious right now, by the end of this article, you’ll have a fair idea of how to achieve them. Not only that, but you will be on your way to improving your landscape photography by using neutral density filters yourself. So are you ready to get started?
What is a Neutral Density Filter?
Neutral density filters, also known as ND filters, are some of the most valuable pieces of equipment that a landscape photographer can have in their camera bag when visiting Iceland.
 Professional landscape photography filters. Photo by: 'NiSi Filters'.
Just like sunglasses are to your eyes, neutral density filters are optical accessories that act to shield the amount of light entering your lens and eventually reaching your camera’s sensor. In doing so, they give you greater control over exposure, allowing you to work with slower shutter speeds to create interesting motion effects which can change the overall mood and atmosphere of your shots.
How Can a Neutral Density Filter be Used in Landscape Photography?
There are two ways that you can use an ND filter: 1) to slow down your shutter speed and 2) to shoot with a wider aperture in bright environments.
Slowing the Shutter Speed with an ND Filter
Slowing down the shutter speed is the most common way of using ND filters. By placing an ND filter in front of your lens, you will reduce the amount of light that enters your camera, causing moving objects to be blurred.
 Long exposure effect with Aldeyjarfoss waterfall in Iceland. Photo by: 'Iurie Belegurschi'.
A popular technique in landscape photography is to shoot with a longer exposure time. This technique involves using a shutter speed of a few seconds or several minutes, which can create dreamy, blurry effects within water or clouds.
Waterfalls, daylight scenes with spotty cloud cover, rivers, seascapes and geothermal areas with rising steam are exactly the types of places in Iceland where neutral density filters come into play and how photographers are able to achieve such beautiful photos by transforming otherwise common points of interest into breathtaking works of art.
Using a Wider Aperture in a Bright Environment
The other way to use ND filters in landscape photography is to create a shallower depth of field in a brightly-lit environment. This technique is great for shooting in daylight conditions that may lead to overexposure. It allows you to shoot at your desired aperture without having to sacrifice the shutter speed, in order to achieve creative effects such as bokeh.
 Blurring the background with a wider aperture in broad daylight. Photo by: 'Albert Dros'.
This is particularly useful when capturing the wildlife in Iceland, such as puffins, sheep, Icelandic horses, Arctic foxes and reindeer. You can blur the background while having only your subject in focus, in order to draw attention to behaviour or some other interesting characteristic or feature.
Different Types of Neutral Density Filters
There are two main types of neutral density filters that are used in landscape photography – the screw-on circular neutral density filter and the square neutral density filter. Both do the same job though there are pros and cons to using each.
Screw-on Neutral Density Filters
A screw-on filter allows less light to seep in around the edges during use. However, due to the way they are designed, these types of filters are difficult to ‘stack’.
 NiSi circular filter kit. Photo by: 'NiSi Filters'.
Stacking filters is how we describe using several different filters at the same time to achieve unique effects. When stacking screw-on filters, there may be a noticeable black ring around your photos, as though you are peeking out of a camera lens. This is called ‘vignetting’ and can be very apparent, especially when you are working with screw-on filters and wide-angle lenses.
Another downside to using screw-on filters is that you will need to purchase multiple filters to fit the different thread sizes on each of your lenses. This can be a rather expensive endeavour, not to mention that it will take up valuable space in your camera bag!
Square or Rectangular Neutral Density Filters
These are a popular choice for landscape photography, as they allow you to stack several filters at the same time with little to no risk of vignetting.
 Square neutral density filters. Photo by: 'NiSi Filters'.
You’ll need an adaptor and a filter holder to use square neutral density filters which may be expensive to invest in but once you have them, you’ll be able to use the same set across all of your lenses. This will save space inside your camera bag, as well as money, which you’ll then be able to put towards other camera gear. Win-win!
What Do the Numbers on ND Filters Mean?
Neutral density filters come in a range of different strengths. They are classified by their optical density (how much light they let in) or equivalent f-stop reduction (how many stops of light that are reduced by using the filter).
For landscape photographers, the easiest way to classify them is by how many stops of light will be reduced by using that particular filter. As such, filters that have been designed with photography in mind are typically labelled as ND 3-stop, ND 4-stop and so on.
However, neutral density filters were initially designed by optical engineers and can be employed for use in fields other than photography. This complicates things, as some filter brands consequently label their products with the ND filter factor number (e.g. ND8) or optical density number (e.g. ND 0.9) rather than by the number of f-stops that are reduced.
Although these labels may be useful for other practices, they don’t make a lot of sense in the field of photography. In addition, it is very easy for photographers to confuse the filter factor number with the optical density number when picking out a filter.
Despite how they’re classified or rated, the general rule is that the darker a filter is, the more light that it will block from entering the lens and reaching your camera’s sensor. This will result in longer shutter speeds and the ability to get more creative with your shots!
Examples of Using a Neutral Density Filter
Let's say that you want to photograph the mighty Seljalandsfoss waterfall on the south coast of Iceland. Your aim is to capture an image of the waterfall where the water is blurred, in order to create a silken effect.
By using a neutral density filter, you can change the exposure time by slowing down the shutter speed to blur the waterfall.
 Seljalandsfoss with a faster shutter speed. Photo by: 'Einar Páll Svavarsson'.
When shooting in broad daylight at ISO 100 with the lens stopped down to f/14, you find that your shutter speed is quite fast at 1/800, causing the water to appear as though it is frozen in time. While dramatic, it looks a bit messy and isn't what you were hoping to achieve.
 Seljalandsfoss with a slower shutter speed. Photo by: 'Kaspars Dzenis'.
However, by attaching a 6-stop ND filter to your lens, you can slow down the shutter speed to 1/13 seconds, which creates the beautiful dreamy effect in the water.
 Puffin with a wider aperture. Photo by: 'Edwin Martinez'.
On the other hand, say you want to photograph a puffin in broad daylight at ISO 100 with a wide aperture such as f/2.8, in order to have the puffin in focus with a soft background.
Unfortunately, when you shoot at f/2.8, your camera overexposes the image with a shutter speed of 1/4000th. The reason that this occurs is that the shutter is unable to release fast enough for the correct exposure.
Using a 6-stop ND filter in this circumstance, you will be able to reduce the amount of light entering your camera, allowing you to shoot with the same aperture at a faster shutter speed of 1/30.
While this will mean that your image is still overexposed, the shutter speed to obtain a balanced exposure is now achievable by your camera. So you can now shoot at your desired aperture of f/2.8 but adjust for a shutter speed such as 1/250th, which will result in a well-exposed photograph with a shallow depth of field in a brightly-lit environment.
 Puffin with bokeh created with a wider aperture. Photo by: 'Iurie Belegurschi'.
With landscape photography in Iceland, there are a range of different ways that neutral density filters may be used to either add drama or to create a sense of tranquility. For example, you could use a neutral density filter to slow down the waves crashing around icebergs at the Diamond Ice Beach for a super sleek and dynamic water effect.
 Drawn out effects of waves at the Diamond Beach in Iceland. Photo by: 'Iceland Photo Tours'.
Alternatively, you could create motion within the fluffy clouds over the Snæfellsnes Peninsula coastline by drawing them out in the direction that they are moving, adding another dimension to an otherwise flat scene.
Neutral density filters are also used to make water look silky, particularly with majestic waterfalls such as Gullfoss on Iceland’s Golden Circle route.
 Gullfoss in a longer exposure. Photo by: 'Iceland Photo Tours'.
Other Types of Neutral Density Filters
Graduated Neutral Density Filter
A graduated ND filter (also known as a 'GND' filter) is one that transitions with a gradient from light to dark. They are designed to help you achieve a balanced exposure across the sky and the foreground, so that neither part of an image is over or underexposed.
 Graduated ND filters. Photo by: 'NiSi Filters'.
These types of filters are particularly useful during sunset and are quite common in landscape photography.
Variable Neutral Density Filter
A variable ND filter is one that allows you to dial in different settings. For example, rather than being fixed at say 3-stops, it will allow you to reduce light by 3, 6 and 10-stops.
The advantage of using a variable neutral density filter is that you will only have to carry one filter with you during your shoots. However, they are generally circular in design and may cause vignetting on ultra-wide angle lenses.
Polarising Filter
While polarising filters are used for reducing reflections and glare in images, they do so by reducing the amount of light entering your camera. Most polarising filters have an ND effect of 2-stops.
Recommended ND Filters for Landscape Photography in Iceland
The neutral density filters that you choose to invest in for Iceland will depend largely upon how you want your final images to look. When considering which strengths to purchase, think about what you would like to achieve in terms of motion and blur effects.
 Movement in the clouds shot with a longer exposure. Photo by: 'Iurie Belegurschi'.
If you want to capture just a slight movement in the clouds, then use a lighter neutral density filter such as an ND 2-stop.
 Motion effects in the waves on the Snaefellsnes Peninsula. Photo by: 'Iurie Belegurschi'.
For stronger motion effects in the clouds or water, try a darker neutral density filter such as an ND 4-stop.
 Dreamy effect of waterfalls. Photo by: 'Iurie Belegurschi'.
If you’re after an even more dreamy effect, or even to get rid of people standing in your way and taking selfies, try using a super dark neutral density filter such as a 10-stop or 15-stop.
Unfortunately, it’s difficult to know which filters will be best for you until you begin to experiment with them. By experimenting, you’ll very quickly discover which filters you will need in your camera bag to achieve the motion effect or type of blur that you are after.
A good place to start though with neutral density filters in landscape photography, particularly for Iceland, is with 3-stop, 6-stop and 10-stop filters. Remember, you can always stack neutral density filters to get a longer exposure time and to achieve the overall effect that you want.
Discovering the secret of using neutral density filters for better landscape photography is just the beginning. The rest will come as you unlock your creativity and take your photography to new heights.
About the author: Serena Dzenis is a landscape photographer based in Iceland. You can find more of her work on her website or by following her on Facebook and Instagram.
Have you had any experience with using neutral density filters in Iceland? Which one is your favourite for creative effects? Leave a comment below!


Other interesting articles
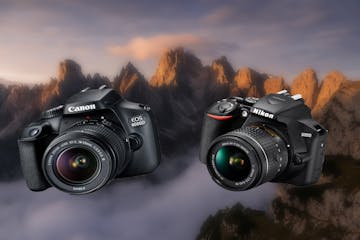

Best Cameras for Beginners in 2020
Nowadays, it can be quite overwhelming and confusing if you're in the market for a new camera, especially if you are just starting out in photography. Until a few years ago, the choices were limited...Read more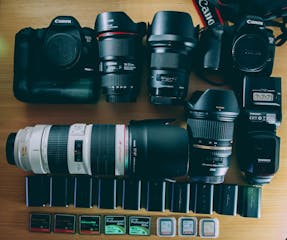
The DSLR Accessories Every Photographer Needs
Once you have your camera and lens, it is time to look into the DSLR accessories that will aid you most with your photography. Whether you are turning your eye towards street, portrait or landscape...Read more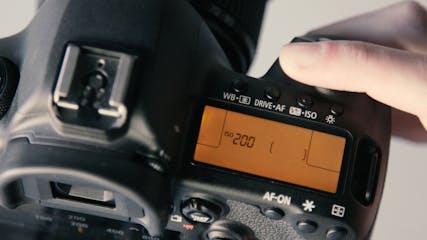
Beginner's Guide to Camera Settings
If you’re reading this, then it’s too late. You’ve probably been sucked into the world of photography and it will now take over your life. In the best kind of way, that is. You've probably just purc...Read more


