
Ultimate Photography Guide to the Dolomites in Italy

- History of the Dolomites
- Camera Equipment
- Camera
- Lenses
- Tripod
- Filters
- When to Visit the Dolomites for Photography
- Summer
- Autumn
- Winter
- Spring
- The Best Photography Spots in the Dolomites
- Tre Cime di Lavaredo
- Lago di Braies (Pragser Wildsee)
- Alpe di Siusi (Seiser Alm)
- Seceda
- Cinque Torri
- Post-Processing Tips
- How to Get to the Dolomites

If you are a landscape and nature photography enthusiast, then the Dolomites are one of the best places in Italy (and possibly in all of central Europe) for you to go on a photo trip.
- Check out these Italy Photo Workshops
- Join us on this Autumn in Dolomites | 8 Day Photo Workshop
- Discover this Ultimate Photography Guide to Tuscany
Sharp mountain peaks, enchanted forests and turquoise lakes... the Dolomites have all of this and much, much more. You’ll feel incredibly small when wandering around in this beautiful area but don’t worry as that's normal when you are surrounded by giants!
There is nothing more special than immersing yourself in the wilderness of the Dolomites by taking a relaxing walk in the high mountain meadows, or by going on a hike to a spectacular mountain lake in this part of the Italian Alps. Enjoying the sun going down while the last light of the day is hitting the peaks is something that you’ll remember for a very long, long time.
In this article I’ll try to cover all of the most important topics for people planning a photography trip to the Dolomites, hopefully by sharing some information that cannot be found anywhere else!
History of the Dolomites
 The Dolomites are a mountain range in Italy. Photo by: 'Leonardo Papèra'.
The Dolomites ('Dolomiti' in Italian) are a mountain range located in the north-eastern part of Italy. They are part of the Eastern Alps and spread through three Italian regions – Trentino Alto Adige, Veneto and Friuli Venezia Giulia.
The boundaries of the Dolomites are considered to be the Adige river in the west, the Val Pusteria in the north, the Pieve di Cadore in the east and the Val Sugana in the south. From this description it may seem that they cover a pretty wide area, though it’s actually not big at all. When you are actually in the Dolomites, everything will be at most a two to three hour drive from where you are. It takes two hours not because of the distance of the journey, but because of the mountain roads and passes which will slow you down quite a bit.
The Dolomites are aptly named as they are made of carbonate dolomite rock. The highest peak of the mountain range is the Marmolada, standing at 3343 metres tall. In 2009, the Dolomites became a UNESCO World Heritage Site.
Photography aside, these mountains are famous all around the world for skiing during the winter season and mountain climbing in summer. The Dolomites are actually home to many of the world’s most important and desired mountain walls for scaling amongst mountaineers.
Now that you now a little bit more about where this mountain range is, as well as a bit of other more general information, I'll move on to talking about what kind of camera equipment is recommended for photography when visiting the Dolomites!
Camera Equipment
 Light camera equipment is the key to photography in the Dolomites. Photo by: 'Leonardo Papèra'.
If you visit the Dolomites, especially during the warm season, you will likely want to go on as many hikes as you can. This means that you’ll have to put all your camera gear in your backpack and bring it with you during all of those hikes.
As a general rule, I like to suggest the "less is better” adage. If you bring all of your camera gear plus food, water and extra clothing, well.. it's going to be one heavy backpack, trust me. It's also going to feel magically heavier after one or two hours of hiking.
The Dolomites can be quite a demanding location for your camera gear. Summer storms are not uncommon up there and of course, snowstorms should be taken into consideration from October to late April. Oh, I haven't mentioned yet that sometimes the wind gusts can be really strong too!
As such, this is what I highly recommend that you have with you as well as what is not so useful for your photography trip to the Dolomites.
Camera
As I was just saying earlier, the weather in the Dolomites (like in every other mountainous place in the world) can get really bad in a short period of time. As such, you should be prepared for any weather conditions with a weather sealed camera, or at least with some kind of camera protection.
There’s not a specific type of camera that I would recommend more than the others for the Dolomites, other than that you go for a full-frame camera (reflex or mirrorless) instead of APS-C or micro 4/3. However, this just my personal opinion. If you don’t have a full-frame camera, don’t worry; you will still be able to capture some incredible photos!
Lenses
 Taking one or two lenses will lighten your camera bag. Photo by: 'Leonardo Papèra'.
Remember that saying that I mentioned earlier about less gear being better? Well, you should apply it when thinking about what lenses to bring with you to the Dolomites. Generally, I like to bring all the lenses with me on a trip, then I’ll select one or two to bring on the most demanding hikes and leave the others in the hotel room or in the car. This selection process is the most difficult part though, since you never know what you’ll find during the hike. You may just need the lens that you left in the car!
Wide-Angle Lens
You shouldn’t have any doubts about bringing this lens with you. This will be your most used lens by far during a trip to the Dolomites, whether you visit in summer, autumn or winter. Be sure to always have a lens within the focal range of around 14-35mm in your backpack or on your camera. You will use it a lot for foregrounds, such as during summer when the wildflowers are in bloom and in winter, when the snow takes on a life of its own.
These are just two ideas for using a wide angle lens in the Dolomites. There are many, many other ways to use one so be sure to bring it along!
Standard-Zoom Lens
Is it even possible to go on a trip without something in the 24-105mm lens range? I honestly don’t think so. Even if it won’t be your main lens, you’ll probably end up snapping some great shots with it.
Almost all lenses in this focal range are not that heavy, so you won't have any excuses: bring your standard lens with you!
Telephoto Lens
Here comes the big “if”. If you have been looking on photography websites for photos of the Dolomites, you have probably already noticed that a lot of them are close-up shots of mountain peaks, taken under dramatic lighting conditions. Yes, these shots are beautiful.
Unfortunately, you won't be able to capture images like these with a wide-angle or a standard zoom lens. The image above was taken at 500mm on a cold April morning, when the sunrise wasn't that great as there were no clouds in the sky (except for a few really far and low on the horizon). I decided to switch from the wide angle lens to the telephoto in order to zoom in on the details of the mountain. Here is the result!
By using a telephoto lens, I was able to heighten the drama in the image. It feels a bit like a storm has been raging all over the place with those dark clouds, while the truth is that it was a sunny morning.
This is just one example of how a telephoto lens can help you to vary the shots within your Dolomites portfolio.
If I had to pick a focal range to bring along with me on a trip to the Dolomites, then I’d say to have as much focal excursion as you can. As such, superzooms like the 200-500m or the 150-600mm lens are perfect in my opinion. The hardest part will be to choose whether to leave it in the hotel room or in the car during your longest hikes, or whether you'll bring it along in your backpack. But that’s a choice I’ll leave to you!
Tripod
 A tripod is essential to photography in the Dolomites. Photo by: 'Leonardo Papèra'.
I know what you are thinking. Don’t, don’t even try. The tripod will be fundamental, regardless of the time of the year you’ll be there, so don’t think to go there with an ultralight, unstable tripod because a good one weighs too much. And no, you shouldn't leave your tripod at home!
I have found that the Dolomites are one of the places in the world where using a tripod is a necessity. The reason isn't even just for the weather, since summer storms aside, there are many other places around the world with worse weather conditions.
The reason that I suggest you bring your tripod is that you may want to use complex photography techniques in the Dolomites, such as multiple exposures or focus stacking, in order to have everything in focus from the foreground to the background.
Do you see the shot above here? Well, that’s a vertical panorama with focus stacking for the flowers. It was painful to shoot and edit but my point is that I could never have gotten that shot without my tripod. I bet that you'll want to take these kind of shots too, so prepare to always have some space for a good tripod on your back, because you are going to need it!
Filters
 You should bring along some neutral density and graduated neutral density filters to the Dolomites. Photo by: 'Leonardo Papèra'.
From personal experience, the only filters that I suggest you bring on a Dolomites trip are a set of neutral density (ND) and graduated neutral density (GND) filters. You might also consider bringing a circular polariser if you have one.
However, using filters is a highly personal choice, since it also depends a lot on the way that you shoot. I know photographers who have never used a filter in their life (but still, they get some incredible photos) and photographers who are pretty much always putting some kind of filter in front of their lenses.
As far as I’m concerned, I just love to use an ND filter to slow things down only if there are things to slow down. For example, in the photo above, I decided to use a filter for the sky since the clouds were moving really fast. It turned out that I liked that smooth effect a lot more than the still shots!
When to Visit the Dolomites for Photography
 The Dolomites are beautiful throughout the seasons. Photo by: 'Leonardo Papèra'.
I will start by saying that you can’t go wrong when visiting the Dolomites, regardless the time of the year that you’ll be there. Having said that, I’d also like to point out that in terms of photography, there are some times that are better to visit than others.
Summer
If wildflowers and green meadows are what you are after, then this is the season that you should travel to the Dolomites. Not all of the wildflowers will be blooming in the same period, so it’s quite hard for me to give you a specific time to go there. However, most flowers bloom between the end of June and the first week of July, so that is a good time to visit.
Summer is also the best time of the year to go on all of the possible hikes, since most of the snow will have melted and all the trails will be accessible.
The only “downside” of visiting the Dolomites during summer is the crowds. Technically, it's the high season (especially during July and August), so you’ll probably find a lot of people around in all of the locations that you want to visit. To get around this, be sure to always head out early and return late in order to avoid the crowds as much as you can.
 Summer is when the wildflowers bloom in the Dolomites. Photo by: 'Leonardo Papèra'.
Autumn
This is the season of golden larches and the first snowfalls of the year. It's probably my favourite season in the Dolomites. You’ll barely see anyone around and the views with all the yellowish trees are just spectacular. If you are lucky enough to capture the contrast between snowfall and the golden trees, well.. you'll come back from your trip with some incredible shots for sure!
 Autumn can sometimes mean the first snowfalls. Photo by: 'Leonardo Papèra'.
Winter
The cold season in the Dolomites generally means only one thing: snow. A lot of snow. Remember that this is a winter paradise for skiers, so you’ll also find a bit of tourism too (not as much as in summer though).
If you visit the Dolomites in winter, then you'd better be sure to pack a lot of heavy clothes to keep you warm during sunrises and sunsets, since it’s probably going to be really, really cold!
There’s one downside to visiting the Dolomites for photography in winter, apart from the cold. Most of the trails will be closed, so you won’t be able to visit many locations unless you are an expert alpinist or you are willing to take some really long hikes with snowshoes to reach the popular spots. Be sure to check if the locations that you are planning to visit are open in winter, otherwise you might be disappointed once you get there!
 There is a lot of snow in the Dolomites during winter. Photo by: 'Leonardo Papèra'.
Spring
This is the season that I generally recommend the least for photography in the Dolomites. Why? Because most of the trails are still closed due to the frozen snow still not having melted. As such, you won’t be able to go on many day hikes.
Until early June, you’ll barely see any wildflowers and at the same time, you probably won’t get any textures in the foreground because the snow is old and melting. It's not the kind of snow you would want to have in your shots.
Spring is a transition period when life comes back again to the mountains, but it takes time. If you really have to go there in spring, try to go in the last part of the season; if you are lucky, you may capture the first wildflowers in bloom.
 Spring is a transition period during which life returns to the Dolomites. Photo by: 'Leonardo Papèra'.
Now that you know when to go visit the Dolomites based on what you want to shot, let's talk about the best locations for photography!
The Best Photography Spots in the Dolomites
 The best photography locations in the Dolomites. Photo by: 'Leonardo Papèra'.
In this section, I'll share with you some of the most beautiful and popular photography locations in the Dolomites. I'll also give you some tips, including what time you should be there and how to get there, with the hope that you'll have an incredible time during your trip.
To help you follow along easily, I have prepared a Google Map (the one that you can see in the screenshot above) that you can download here. It's a good reference for checking distances from one location to the next.
Tre Cime di Lavaredo
 Tre Cime di Lavaredo is the most famous photography location in the Dolomites. Photo by: 'Leonardo Papèra'.
Let’s start with the most famous one, shall we?
The Tre Cime di Lavaredo ('Three Peaks of Lavaredo' in English) are surely the most popular location of the Dolomites and one of the most spectacular places in the area for photography.
You can drive up until the Rifugio Auronzo from the Misurina lake, but there’s a toll to pay if you want to arrive to the hut with your car (currently, it’s 30€/car). Other options include taking public transport from Misurina which can be a little bit cheaper (around 8€/person round trip) or by walking up, since there’s a steep trail that starts close to Misurina. The hike to Rifugio Auronzo will take you about 2h and 30m.
Once you have arrived to the Rifugio Auronzo, there will be a fairly easy 1h 30m hike to the Rifugio Locatelli (Drei Zinnen Hutte). This is where you can get the classic view of the Tre Cime, as in the photo above. From there, you can continue on the main trail that goes around the Tre Cime, which will connect you back to the parking lot. You can also return from the same way that you came.
If you continue on the trail, you’ll arrive at another famous location for photography. You'll find a few small lakes and a small stream, both of which are perfect foregrounds with the majestic peaks of the Tre Cime in the back (like in the photo below)! You can reach this area from the parking lot by taking the trail in the opposite direction. It will take you about 45 minutes.
The best time to visit Tre Cime for photography is summer. During this season, there will be wildflowers pretty much everywhere – the whole place is really colourful. The road that leads to the first hut is closed from late October (depending on the snow) until May, so if you’ll be there outside of the summer season, then you’ll have to take quite a long and gruelling hike to arrive up there, with snowshoes on if there’s snow.
The best time of the day for photography at Tre Cime is sunset, since the last light of the sun will hit the walls of the Three Peaks. Night is also an option. If the skies are clear, then I highly recommend that you try a few Milky Way shots!
 Sunset is beautiful at Tre Cime. Photo by: 'Leonardo Papèra'.
Lago di Braies (Pragser Wildsee)
 Lago di Braies is a famous Instagram photo spot in the Dolomites. Photo by: 'Leonardo Papèra'.
If you’ve opened up Instagram once, just once in your lifetime, then you have probably already seen some pictures of this lake. It has become incredibly famous in the last few years and right now, it’s probably the most famous lake of the Dolomites.
Why? Well, because it’s beautiful to start. Second, it’s easy to reach, since there’s no hiking involved at all, except for a walk around the lake but I wouldn’t call that “hiking”. Last but not least, it has received a lot of advertising on social media!
Since it can get really, really crowded during the high season (summer) at Lago di Braies, I recommend to visit this spot in autumn. There are many larches around the lake, so you can shoot far more interesting photos during the fall season compared to summer. Add this to fewer people being around and you'll have a recipe for success!
Whether you choose to go there in summer or autumn, be sure to arrive really early in the morning, since you won’t find any people around (except maybe for some other photographers). If you can’t be there for sunrise, then sunset is also a good option.
 Autumn means colourful larch trees in the Dolomites. Photo by: 'Leonardo Papèra'.
Alpe di Siusi (Seiser Alm)
 Alpe di Siusi is a breathtaking photography location in the Dolomites. Photo by: 'Leonardo Papèra'.
The Alpe di Siusi is another place that should be on this list; the views on the Sassolungo and Sassopiatto (the mountains in the background) are breathtaking. If you are lucky, you’ll get also some low fog hovering over the meadows!
This spot is a 2h 30m drive from the Tre Cime / Braies Lake area. You'll need to take the road to Compaccio (also known as 'Compatsch'), which is the small village from where you’ll find all the roads and trails to visit the meadow. This road is open to the public from 5 p.m. until 9 p.m., while during the rest of the day it is open just for those who have an hotel reservation or locals.
From Compaccio, there’s another stretch of road before you'll finally arrive in the meadows area (like in the photo above), but it’s a limited traffic area so be sure to stop at the main parking lot and don’t go further if you don’t want to receive an expensive ticket! You can only drive there if you have an hotel reservation in that specific area. Yes, we like to make things complicated here in Italy, I know.
The Alpe di Siusi is always a great spot for photography, regardless of the time of the year. However, summer and autumn are probably the best seasons to visit. During summer, you'll get that nice side light (like in the photo above) and the green fields, while in fall you will be able to capture a sunstar and colourful larches (like in the photo below). Now it’s up to you, which one do you prefer?
Both sunrise and sunset are great here. The pictures that you have seen above and below were taken during sunrise. During sunset, you'll get the sun going down behind you, so there will also be the chance of photographing the last light on the peaks!
 Sunset and sunrise make the Alpe di Siusi all the more enchanting. Photo by: 'Leonardo Papèra'.
Seceda
 Seceda's sharp peaks rise towards the sky. Photo by: 'Leonardo Papèra'.
The Seceda is probably my personal favourite among the locations that are on this list – the sharp peaks that rise from the valley are a view you can hardly forget.
There are two options to visit the Seceda: the first one (and the easiest one) is to take the cable car (32€/person). From the parking lot, it will take you up there at 2500m in around 25 minutes.
The second way to reach the Seceda is by walking, but it’s going to be quite a long and steep hike to the top.
The cable car is not open all-year round, so be sure to check out first if it’s running during your visit, otherwise you may only have one option. Generally, it’s closed during the low seasons, which are autumn and spring.
If you want to photograph the sunset or sunrise up at Seceda, then the only way to do it is by camping overnight unless you book one of the few expensive cabins there. The opening hours of the cable car won’t coincide with your photography schedule, since they open around 9 a.m. in the morning and close around 5:30 p.m. in the evening.
Summer is the best season for photography at Seceda, as there are plenty of wildflowers which make for great foregrounds and wide angle shots.
At sunset, you'll get the light on the peaks (like in the photo below), while at sunrise you will get the sun rising right in front of you. Both are great moments to be out there!
 There are lots of wildflowers in bloom at Seceda during summer. Photo by: 'Leonardo Papèra'.
Cinque Torri
 Cinque Torri is less crowded than the other locations. Photo by: 'Leonardo Papèra'.
The last location of this list is the Cinque Torri. While still famous, it is probably a bit less crowded than most of the other locations mentioned above. Let’s say that if you are lucky enough, you may even get the place entirely for yourself at sunrise!
This place is also one of the easiest to reach: it’s really close to Cortina d’Ampezzo and you can drive down the towers (except from late July until the end of August, as well as when there’s snow on the road). From the parking lot, you’ll arrive to the Rifugio Scoiattoli (the spot where the photo above and all the most popular images are made) with a 25 minute easy hike. Other options are the cable car that will take you directly to the Rifugio Scoiattoli or walking from the cable car parking lot, along a 1h 30m trail.
I like this spot all through the year; in summer you'll get wildflowers below the towers, while in winter you will get some beautiful snow textures. In autumn, the Cinque Torri are surrounded by colourful larches.
At sunset, you'll have the chance to capture the last light on the towers (like in the photo above) while at sunrise, you may get the sun peaking through the rocks! You really can’t go wrong when visiting the Cinque Torri!
Post-Processing Tips
 Focus stacking is a good idea when shooting with wide angle lenses. Photo by: 'Leonardo Papèra'.
Well, there are not many specific tips that I would recommend for the Dolomites when it comes to post-production. If you are shooting with some really close foregrounds (e.g. flowers, rocks, trees, snow, etc), then be sure to always focus stack, otherwise you’ll end up having the foreground slightly out of focus. This can be a problem in post-production when you are trying to merge all the photos with the different focus points to get one single, focus stacked image.
If you have some light on the peaks then try to enhance it as much as you can by working with curves, colour balance and the HSL sliders to decide what kind of colour cast you want on them and how much contrast you want in that area. As always, I recommend to double check the shot, even in a few days time, to see if it’s oversaturated or looks too contrasty. My suggestion is to keep things as natural as you can.
How to Get to the Dolomites
As you would expect from a mountainous area, the Dolomites are not that comfortable or easy to reach.
The two best-served airports “close-by” are Milan or Venice, otherwise Bozen airport is also a valid option.
From the airports, you’ll have two options to reach the Dolomites: by car (highly recommended) or with public transport. Of course the latter is cheaper but as a landscape photographer, you’ll have to give up on so many occasions due to the timetable that I can hardly tell you the trip will be worth it at all, honestly. The only way to roam around as much as you can and visit all the locations for photography is by car. Whether you go with your own or with a rental car, driving is the most comfortable way to travel in the Dolomites.
 The Dolomites are best reached by car. Photo by: 'Leonardo Papèra'.
Well, if you haven’t got it yet, the Dolomites are a beautiful location for landscape photography. You can stay there easily for 15 to 20 days and shoot different locations without getting bored. The only thing you really need to pay attention to while planning your trip is which locations you want to see and check if it’s possible to access them during your visit. In the past, I have had many clients and friends visiting the Dolomites from different parts of the world, only to be disappointed because they were there at the “wrong” time.
 Pay attention to whether you can access the locations that you want to photograph during your visit to the Dolomites. Photo by: 'Leonardo Papèra'.
If you have scrupulously planned your vacation, then the only thing for you to do now is to relax and enjoy your photography trip to the magical Dolomites in Italy!
About the author: Leonardo Papèra is a landscape photographer based in Italy. You can find more of his work on his website or by following him on Instagram.
Join us on the adventure of a lifetime in the magical Dolomites of Italy! This 8-day photography workshop will take you to all of the locations mentioned above and more.


Other interesting articles
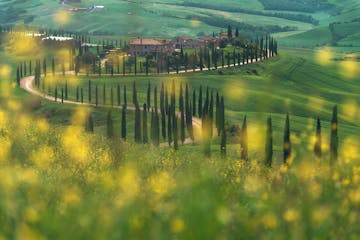

Ultimate Photography Guide to Tuscany
Can you imagine yourself enjoying a peaceful sunset from the Pienza balcony in Tuscany, overlooking the 'Gladiator's House' and all the rolling hills of Val d'Orcia? How about sipping a glass of red...Read more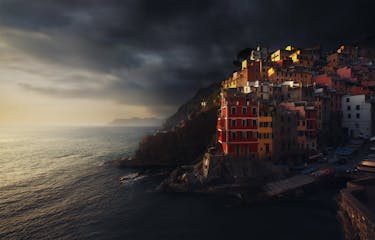
Ultimate Photography Guide to the Cinque Terre in Italy
If you are looking for a place to spend a few days in total peace, where you can focus only on taking some beautiful pictures, enjoying some spectacular sunsets with the sun “falling” into the sea a...Read more


