8 Tips for Photographing Fall Colours in Iceland

Autumn in Iceland is a wonderful time of year. This period of natural transition is characterised by a number of breathtaking changes, marked by shorter days following the last hurrah of the Midnight Sun.
- Check out these 25 Useful Tips to Quickly Improve Your Landscape Photography
- Discover this Ultimate Guide to Photographing the Moon
Although the nights are darker and longer, the weather remains pleasantly warm. Not only will your chances of seeing the Northern Lights increase as darkness returns to the skies, but the windswept scenery of the island will become bathed in the vibrant, earthy colours of fall.
With so much to photograph, it is no surprise that photographers love to travel to Iceland in autumn. So to get you ready for your autumn photo workshop, here are our top tips that will have you capturing marvellous photos of the spectacular fall colours in Iceland in no time.
Tip #1: Don't Sacrifice the Aperture
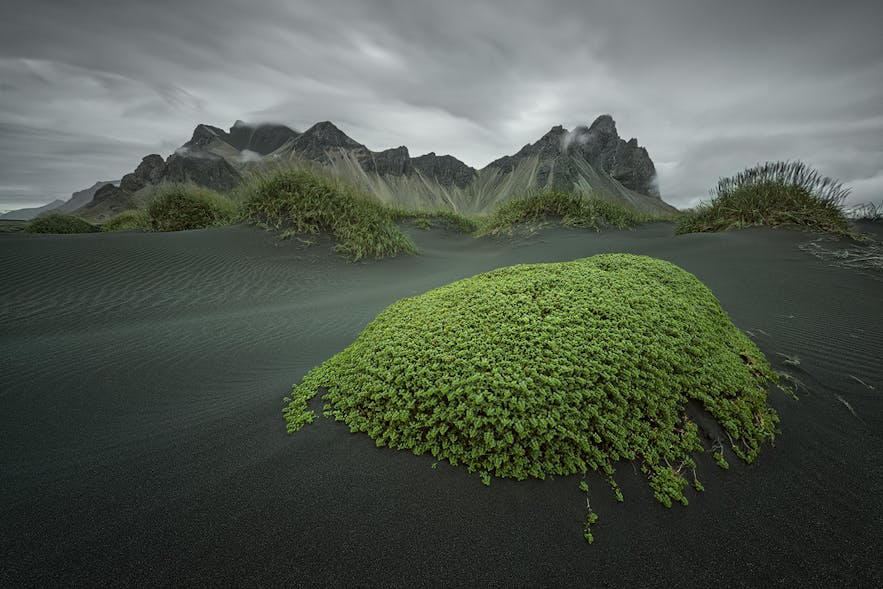 Use a wide enough aperture that you can separate the foreground from the background, but not so much that the latter is blurry. Photo by: 'Iceland Photo Tours'.
With so many autumn colours bathing the scene in Iceland, it can be difficult to find something to focus on. Using a wide aperture will allow you to create visual contrast between the subject and the background, so that the subject may be isolated from the chaotic blend of colours.
However, when utilising this photography technique, make sure that you have the desired amount of the subject in focus, so as to give the eye something meaningful to rest on. You don't want to go so wide that you'll end up sacrificing your depth of field. The aim is to create a harmonious balance between the foreground and the background, so that the latter doesn't appear to be overly blurry.
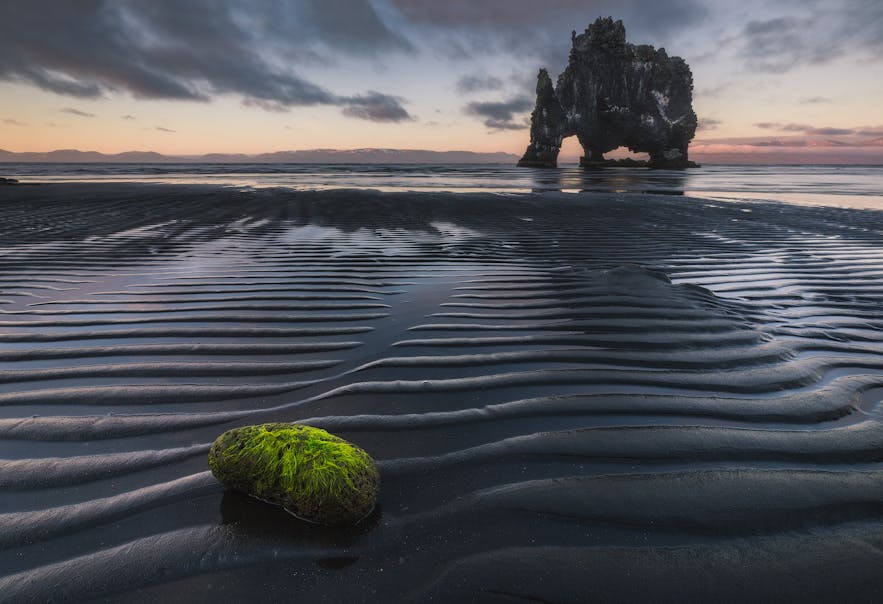 Green moss is particularly beautiful during autumn at Hvítserkur. Photo by: 'Iurie Belegurschi'.
Take the image above of the gorgeous ripples in the black sand at Hvítserkur, a rock stack situated on the Vatnsnes Peninsula in the northwest of Iceland. It is made all the more marvellous by the green moss clinging to a rock in the foreground.
Isolating the textures and patterns in the wet sand here has made the image much more dynamic and expressive. Although the aperture is wide, it is not so far open that Hvítserkur is forgotten in the background. Rather, it remains a strong subject with just enough sharpness that it anchors the shot and mimics the natural depth of field of the human eye.
Of course, when using a wide aperture, you'll still need to ensure that you end up with a balanced exposure. As such, check the histogram on your camera's LCD to make sure that no highlights are clipped. If you need a little more saturation in the colours, then simply dial in some exposure compensation.
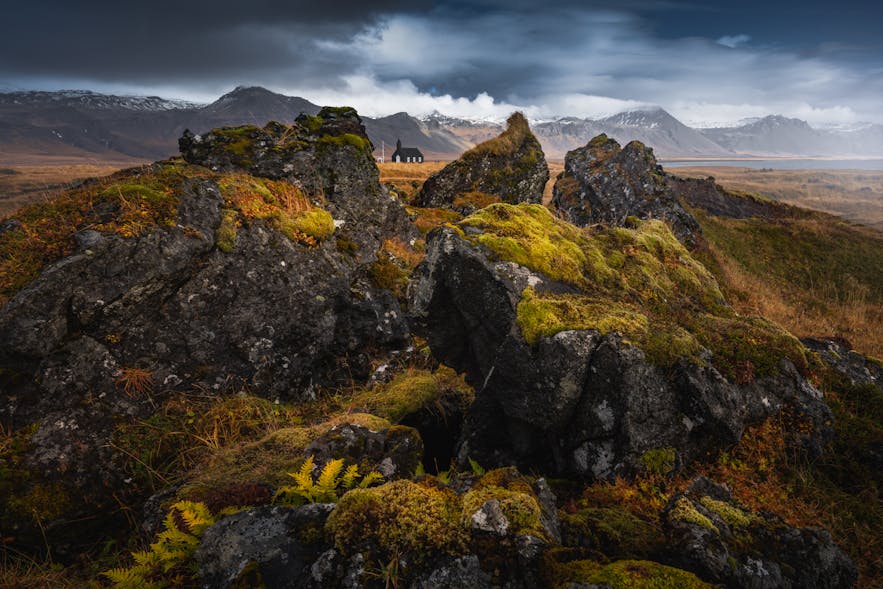 Pay attention to the histogram to ensure that you haven't blown the highlights or clipped the shadows. Photo by: 'Albert Dros'.
If you still can't get the desired exposure with your chosen aperture, then try using a higher ISO to maintain your shutter speed. However, if you're shooting on a tripod, then the shutter speed won't really be an issue. You'll still be able to shoot at the lowest ISO setting albeit with a longer exposure time.
Tip #2: Shoot with a Longer Lens
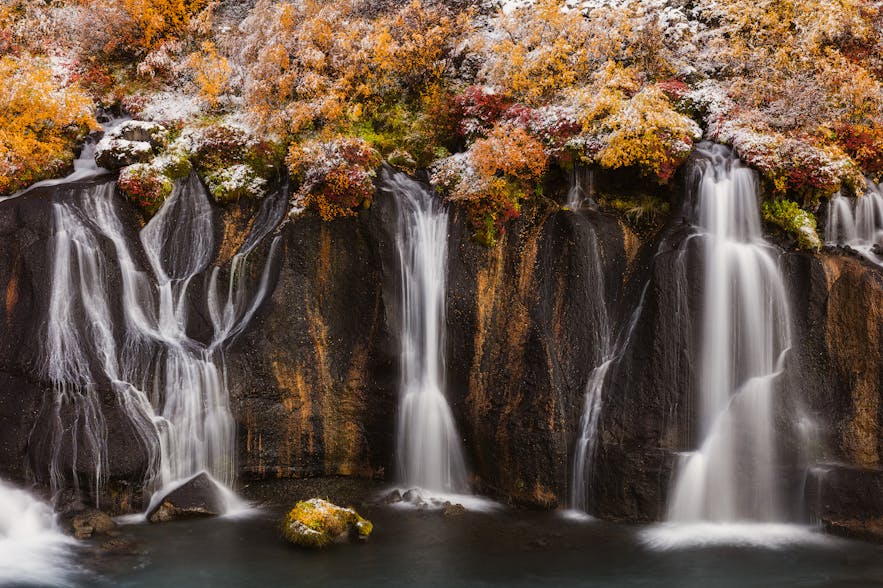 A longer lens is useful at Hraunfossar waterfall. Photo by: 'Iurie Belegurschi'.
At certain locations within Iceland, such as the stunning Hraunfossar where cascades of water flow down smoothed lava walls speckled with orange, yellow and green moss, it pays to put away your wide-angle lens and to use a longer focal length instead. This will allow you to simplify the complexity of the scene, making your final image as much about the composition as it is about the autumn colours.
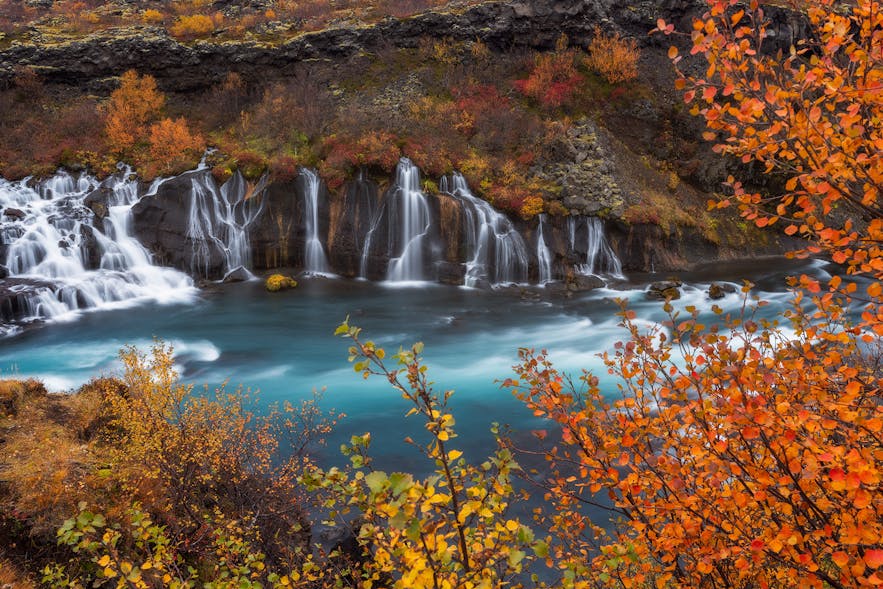 A lens between 24mm to 200mm can provide interesting results at Hraunfossar. Photo by: 'Iurie Belegurschi'.
Experiment with lenses within the 24-70mm and 70-200mm focal range. By using a longer focal length, you will also be able to isolate different aspects of the landscape, opening up new opportunities to reveal interesting subjects at an otherwise well-photographed landmark.
To minimise any vibrations or camera shake when shooting at these lengths, use a tripod or turn on the image stabilising option on your lens if you will be shooting handheld. Doing so will enable you to capture much clearer, sharper photos.
Keep in mind that your depth of field will minimise with a longer focal length, so to get the most from your shot, use a small aperture or take a sequence of images at different focal points that you can focus stack later during post processing.
Tip #3: Make Autumn Colours the Secondary Subject
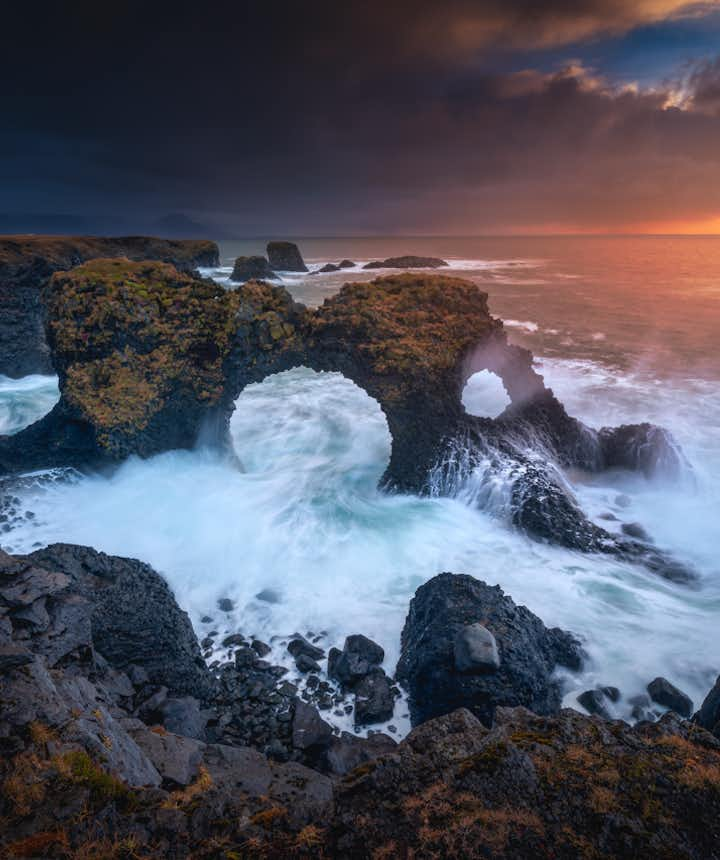
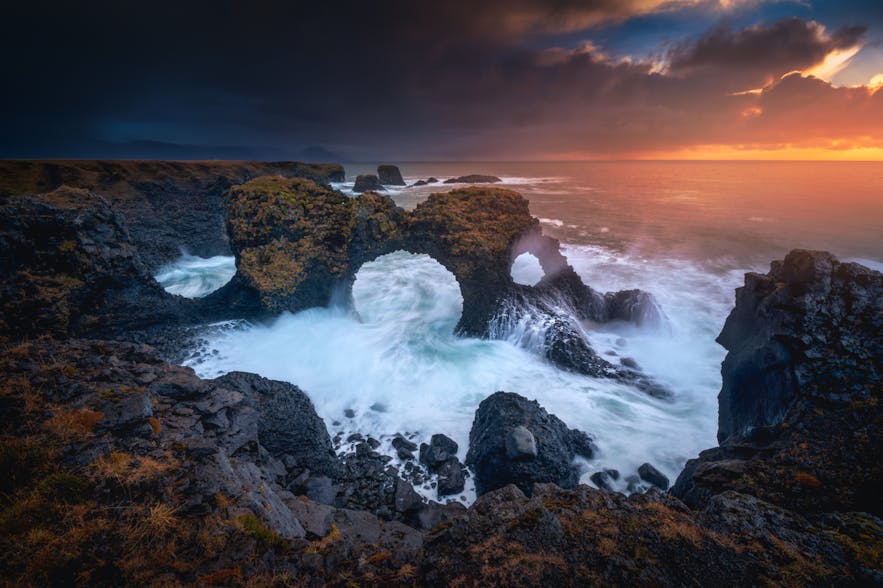 The autumn colours in the moss on the cliffs here are secondary to Gatklettur as the subject. Photo by: 'Albert Dros'.
The trick to creating a strong photograph of Iceland in autumn is to make the brilliant colours of fall a secondary subject. That’s right: rather than being stunned by the colours and not knowing where to start, treat the scene like any other time of the year!
Look for an interesting composition by focusing on patterns and textures, then use the colours to enhance it. Autumn colours are usually bright, so try to identify elements that will provide some contrast.
A great place to try out this technique is on the rugged coastline of Arnarstapi on the Snæfellsnes Peninsula in Iceland's northwest, where the basalt rock arch of Gatklettur stands tall against a background of green and orange moss clinging to the jagged cliffs. The rocky strata is made all the more dramatic when there is a juxtaposition of vibrant colours against darker elements, such as the basalt itself.
Tip #4: Wait for Interesting Light
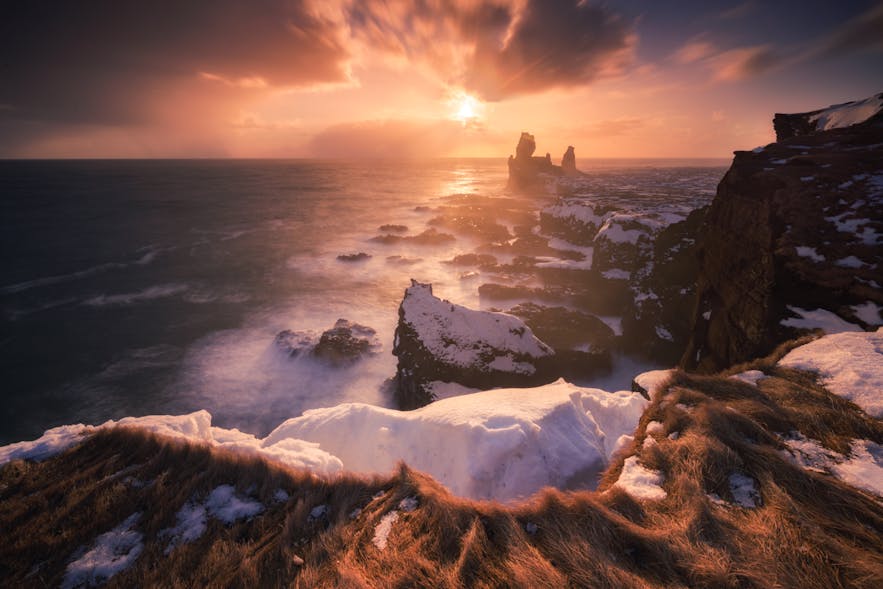 Lighting can make or break a picture. Photo by: 'Albert Dros'.
As with photography at any time of the year, the difference between a good picture and one that is truly great lies in the magic of lighting. Rather than snapping a dull autumn scene, wait for interesting light to really illuminate those fall colours and to bring out the vibrancy of the foliage.
The best time of day to photograph autumn colours is in the early morning or evening – yes, that means getting up for sunrise and sunset! The lighting is softer at these times and can produce deeper, richer colours.
When photographing at these times, take note of the direction in which the light falls upon the scene. The light can often come in from a side angle at sunset. By positioning yourself to make the most of this side lighting, you will be able to utilise shadows to your advantage by adding more contrast to the scene.
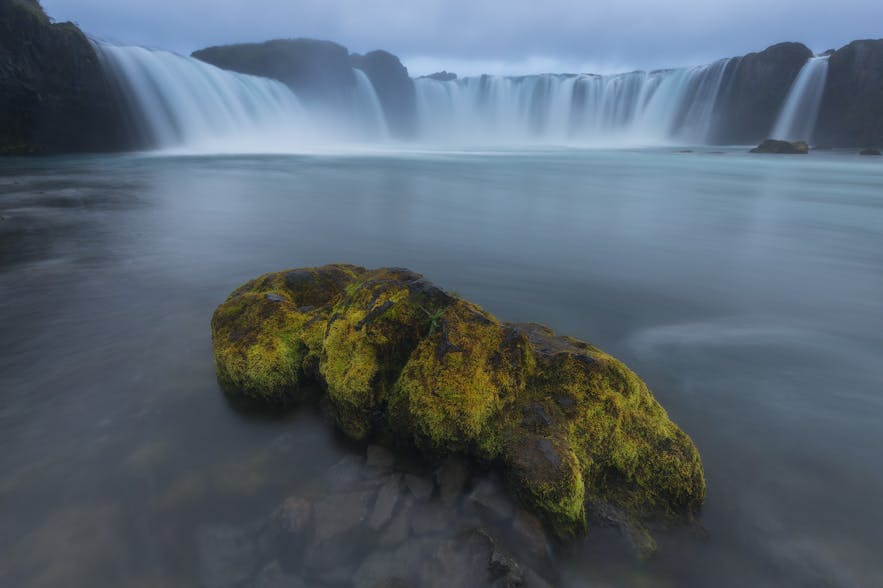 It is possible to bring out the colours in the moss even on an overcast day at Godafoss. Photo by: 'Iurie Belegurschi'.
Shooting during an overcast day or in bad weather may be frowned upon by some landscape photographers, though it's actually a great time to head out for photography in Iceland! The lighting will be softer and more even, meaning that you'll have less shadows for a more dreamy effect. In addition, you'll find that the intensity of the colours in the environment may be contrasted nicely with the grey skies overhead. Just try to avoid including too much of the sky in your frame in order to keep things interesting.
Tip #5: Look for Water
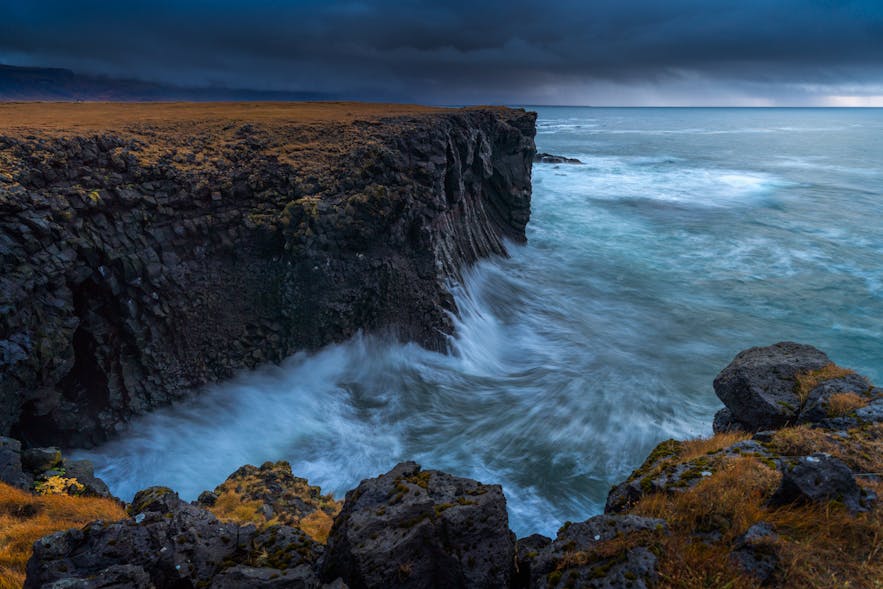 Water can highlight the colours of autumn foliage. Photo by: 'Albert Dros'.
When photographing Iceland in autumn, don’t be afraid of a little water or rain! Wet, colourful scenes of fall can be especially magical during fall. It's the best time for focusing on foliage such as leaves or moss, as the water can enhance the colours, increase contrast, create texture and make your shot even more artistic.
Try swapping to a macro lens or even using the macro function on your smartphone camera for interesting results.
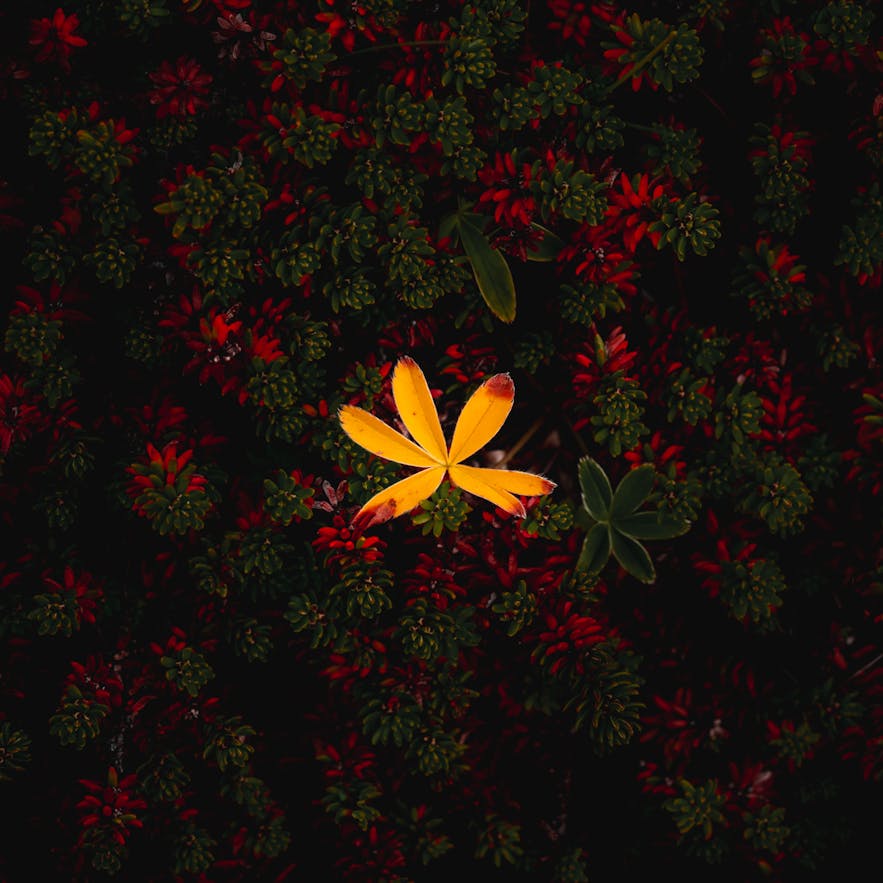 Switching to a macro lens can provide interesting results. Photo by: 'Albert Dros'.
Autumn colours can also make for great reflections in pools, lakes, fjords and even along the coastline. It's a good idea to shoot these subjects from a higher elevation if possible, in order to make the most of the earthen hues and the sweeping grandeur of the landscape. If you have a drone, then it's a great time to practice your aerial photography, though you can do just as well simply by standing with your D-SLR at a higher vantage point.
A wonderful place that offers a natural, higher view of the surrounds is Dyrhólaey on Iceland's south coast, where the rising of the sun can reflect brilliant colours all across the windswept cliffs.
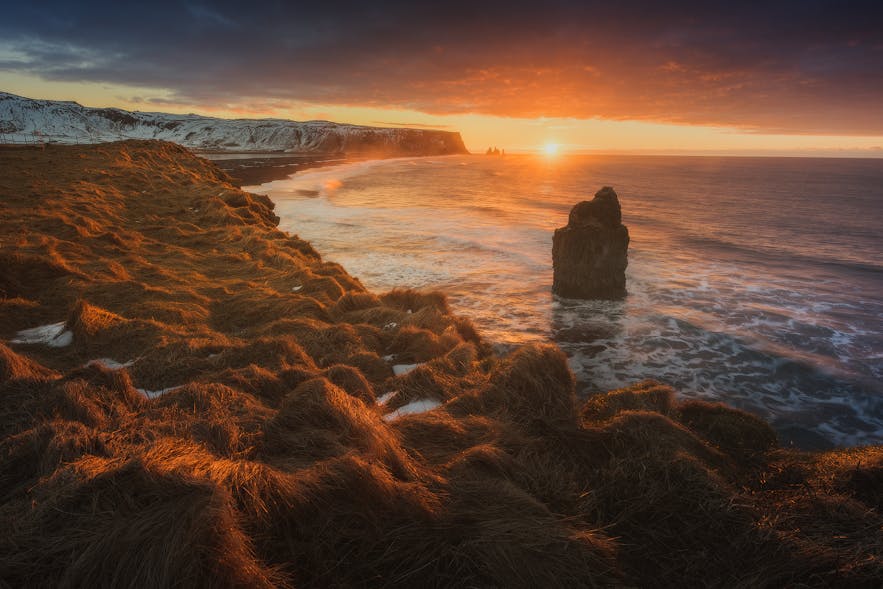 Dyrhólaey offers a natural view of the sweeping black sand beaches of the south coast. Photo by: 'Iceland Photo Tours'.
You can even catch reflections of the sky in the mud pools at steaming geothermal areas. If the surface of the water is misty or the mud is particularly smokey, then don’t put your camera away! Misty ponds and steaming geothermal vents can make for some very atmospheric photos. So keep your eyes open for water and other surfaces on which you can catch autumn reflections or haze. These types of shots can make for very special and unique photographs of Iceland.
Tip #6: Use a Polarising Filter
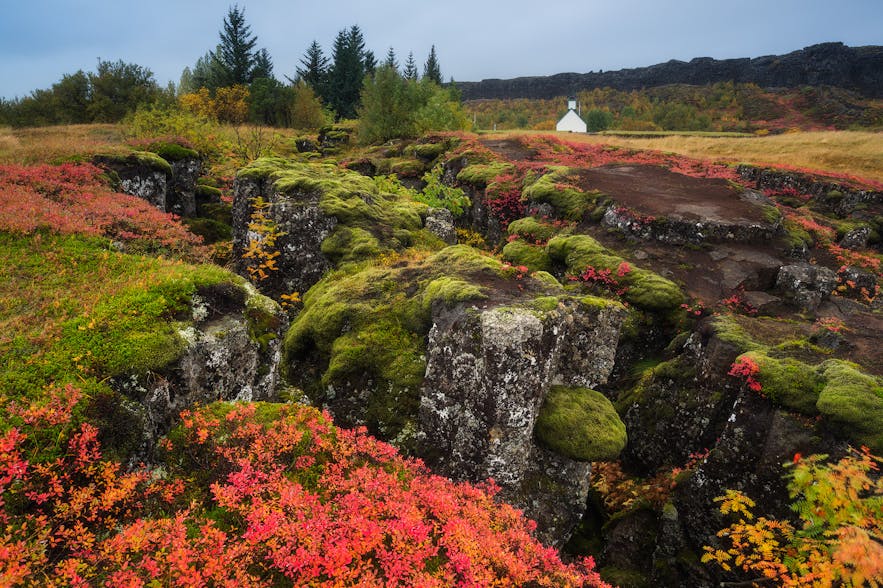 A polarising filter can bring out the intensity of autumn colours. Photo by: 'Iurie Belegurschi'.
When it comes to highlighting the impact of autumn colours, a polarising filter is one of the most important tools that you can have in your camera kit.
Using a polariser can deepen the colour of blue skies, saturate fall colours, as well as reduce glare and reflections in bright or sunny conditions. Polarising filters can also intensify the autumn colours of wet foliage and cut through the haze in the atmosphere, allowing the subject of your image to stand out more against the myriad of colours.
If you’re unsure of when to use a polariser while you are in Iceland, hold it up and look through it with your eye instead of screwing it onto the lens. This is a quick way to see if the polariser will have any effect.
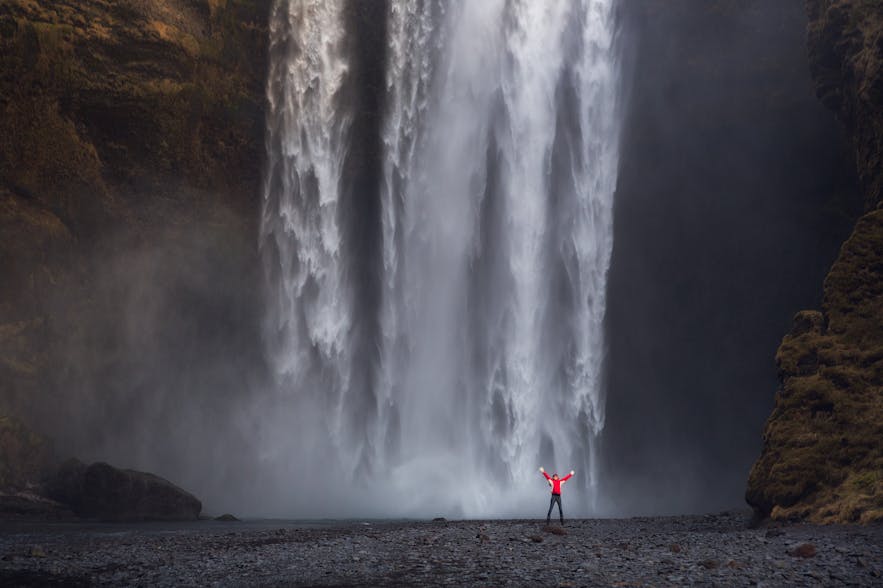 A polariser with a telephoto lens can help you to cut through the haze at places such as Skogafoss waterfall. Photo by: 'Iurie Belegurschi'.
In autumn in Iceland, it is best to utilise a polarising filter just before midday, when conditions can be brighter. The increased brightness adds extra contrast to the scene and cuts through the haze, especially when shooting through a telephoto lens at a place such as Skógafoss waterfall on the south coast of Iceland.
Tip #7: Intentional Camera Movement
In most situations, keeping your camera as still as possible is the norm. You may have invested heavily in a tripod, remote shutter release and even lenses with image stabilisation capabilities to reduce the risk of camera shake. However, there is no better time to knock your camera around and move it about than during autumn in Iceland!
Intentional camera movement is a creative technique that involves moving the camera as the image is being taken. This technique can open up a range of creative opportunities to you whilst photographing autumn in Iceland, allowing you to make some truly unique shots of the landscape. One example of intentional camera movement is panning. This is where you move the camera to mimic that of a moving subject, although the subject itself remains still. This will ensure that the subject is sharp whilst the background is blurred, reducing the number of sharp details in the cluttered autumn landscape, thereby allowing you to concentrate on lines, form and colours instead for an interesting abstract shot.
The key to getting this technique right lies in the shutter speed. You’ll need a long enough shutter speed to capture significant motion blur, such as ⅓ or ½ second exposure time. To achieve this, make sure you are at your camera’s lowest ISO setting with the smallest aperture dialled in. You may need to use a polarising filter, a neutral density filter, or even a combination of both to get down to an appropriately slow exposure.
- See also: A Life-Changing Experience In Iceland
Tip #8: Capture the Wildlife
Autumn in Iceland doesn't have to be all about photographing the colours of the foliage or the moss. Try turning your eye to the wildlife instead, which can make for extraordinary shots.
In the image below, you can see that the Icelandic horse is lit up by warm side lighting, which conveys drama with a hint of serenity during what would be an otherwise mundane moment of an animal grazing on the grass.
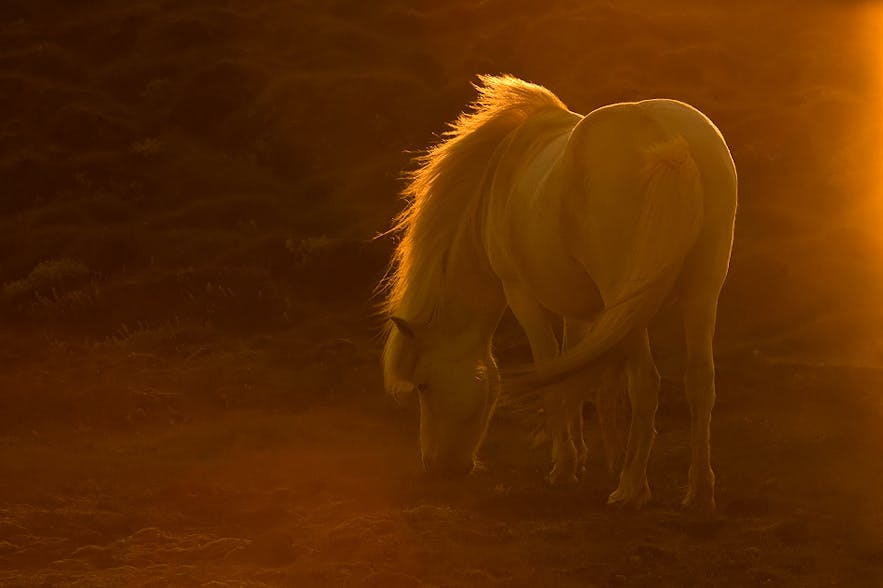 An Icelandic horse in the enchanting autumn light. Photo by: 'Raymond Hoffman'.
The following image is more subtle, featuring a high level of detail in the textures created by the autumn lighting. This close-up brings out the character of the horse and portrays the enchantment that the colours of fall bring, not just to the environment but to the animals that reside within the Icelandic landscape.
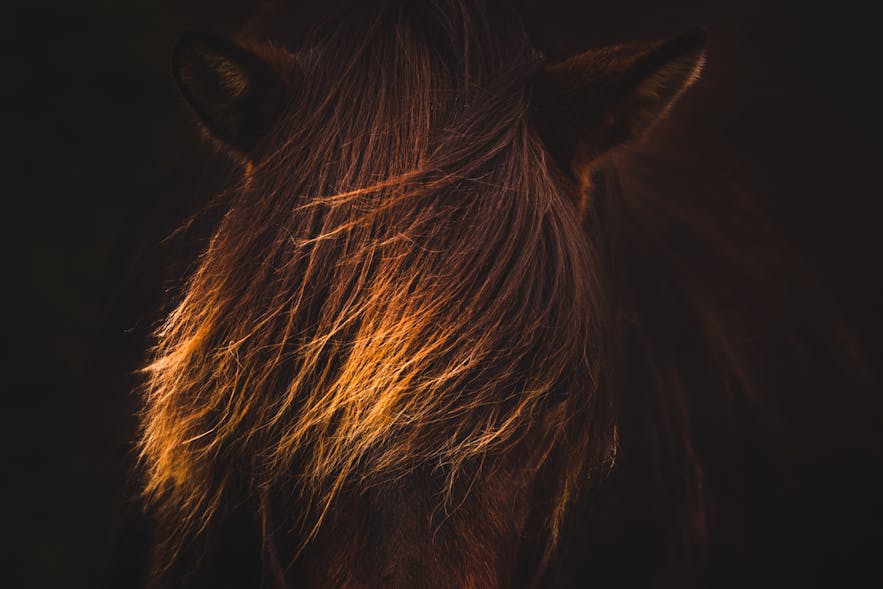 Close-up of the textures in an Icelandic horse's mane, highlighted by autumn light. Photo by: 'Raymond Hoffman'.
Now that you’ve got our top tips for photographing Iceland in autumn, it’s time to get ready for your tour! If you haven’t already got a place reserved, then check out our stunning range of Autumn Photography Workshops to get you started.
As you’ve already seen, autumn is a great time to head to Iceland, when the vast expanse of nature transforms into a vibrant and colourful landscape. Develop your skills as a photographer, build an incredible portfolio, and immerse yourself in the vivid fall colours of Iceland.
About the author: Serena Dzenis is a landscape photographer based in Iceland. You can find more of her work on her website or by following her on Facebook and Instagram.
Join us on an adventure through the the best of the country’s majestic landscapes on a 9 day, 11 day or 14 day autumn photography workshop. With so much to photograph in this stunning season, it’s the perfect time to visit Iceland!
Other interesting articles

Ultimate Guide to Urban Exploration Photography
Urban exploration photography (also known as 'urbex' photography) has been rising in popularity. In case you've never heard about it, this guide is designed to be your introduction to this special f...Read more
27 Iceland Photography Locations That Will Blow Your Mind
With so much raw and natural beauty in one tiny place, it’s no wonder that Iceland is one of the most popular places in the world for landscape photography. Explore these articles on Landscape and...Read more
Landscape Photography | Everything You Need to Know
Few photography genres are as comprehensive as landscape photography. Along with portrait photography, this is the biggest area of photography to get started in. After all, both get distinct frame o...Read more


