
Ultimate Guide to Focus Stacking


You’ve heard of it. You’ve done some research about it. You have felt overwhelmed by it. There are legends which cause some people to shiver just by hearing someone talk about it. Yes, you probably know what I’m talking about: the (in)famous technique called “focus stacking”!
- Check out this Ultimate Guide to Understanding Focus in Photography
- Learn all about How to Use Leading Lines for Better Compositions in Landscape Photography
Focus stacking is considered by many photographers to be a very complex photography technique. While it requires a certain amount of practice before nailing it, it is certainly not impossible to learn. Everybody can do focus stacking; it’s all about getting the hang of the process and very soon, you'll be doing it easily after a few attempts.
In this article, we'll discuss how to focus stack without making any mistakes, starting from shooting in-field and ending behind the computer in the post-production phase. I'll be using Adobe Photoshop but you can use any post-processing software you like to achieve the same result.
What is Focus Stacking and Why Should You Do It?
As the name suggests, the aim of the focus stacking technique is to merge a number of shots into one final, single image where all of the different focus points are stacked together. Doing so will help you to gain a lot more depth of field, all by taking different shots with individual focus points and then merge them together in post-production.
 Focus stacking is a great photography technique to get everything in focus from the front to the back of your image. Photo by: 'Leonardo Papèra'.
The logical question that might come to mind now is: why on Earth should I bother doing of this, instead of just stopping down the aperture a little bit more? Has Leonardo gone crazy?
The answer is no, I’m still fine! There are some situations where you really will need to focus stack in order to achieve sharpness from the front to the back. This occurs generally in landscape photography, when there are subjects that are really close to you in the foreground. It's also the case in macro photography, when you are trying to get the whole subject in focus. In these cases, stepping down the aperture of your lens won’t be enough in order to achieve the depth of field you need to have everything in focus. You can try closing your aperture down to f/22 or more (if the lens allows) but you still won’t have everything in focus.
Oh, and let’s not even mention the diffraction and loss of quality you would get by shooting with such close apertures.
So that’s exactly why you should do focus stacking: to capture a lot more depth of field than what is possible to catch with a single exposure.
When to Focus Stack?
I am asked this question so many times during classes and photo workshops. Once you learn how to play with the focus stacking, you will probably want to use it for every shot you take. However, since it’s a time consuming technique, I prefer to do a focus stack just when it’s strictly necessary.
You will need focus stacking only for those cases in which you can’t have the whole scene in focus with a single shot. Wildflowers in the foreground with a wide angle lens or a close-up macro image of an insect are just a couple of examples.
 Focus stacking is great for landscape images shot in vertical orientation that have something interesting in the foreground and a distant background. Photo by: 'Leonardo Papèra'.
If you are at a safe distance from the nearest thing that appears in your photo (let’s say 1 metre on a wide lens), then there’s no need for any focus stacking. You'll be able to get everything in focus, just by stopping down to f/11 or other "normal" landscape apertures.
Before focus stacking, another technique to keep in mind is to try using the hyperfocal distance of your lens. I won’t explain here what the hyperfocal distance is since it would require a whole article to explain it properly but you should know that it is another technique worth considering when you have subjects close to your lens.
If taking an image by stopping down the aperture or using the hyperfocal technique is not working, only then should you start to focus stack.
How Do You Take Focus Stacked Photos?
Making a focus stacked image isn't as difficult as it seems. We’ll start by taking a look at what pieces of gear you will need for this technique, as well as how to work with them in the field. For the sake of the article, we’ll mainly consider just two photography genres – landscapes and macro – which are the ones where focus stacking is more widely used.
 Taking focus stacked images requires basic camera equipment. Photo by: 'Leonardo Papèra'.
What You’ll Need
What do you need to capture a focus stacking sequence? We’ll talk separately about landscape and macro photography, since these two photography genres require different pieces of gear.
Landscape Photography
When focus stacking in landscape photography, all you’ll need is your camera, lens and tripod. The tripod will be fundamental to the process as without it, you won’t be able to keep the images perfectly aligned and identical. With focus stacking, there shouldn’t be any difference in terms of framing. While you can still focus stack when shooting handheld, even if you have the most steady hands in the world, there will be some slight changes between the images. This could mean that your editing software may not be able to align them later.
Macro Photography
If you are just starting out and want to try the focus stacking technique with macro photography, you won't need anything more than your camera equipment and a tripod, since you’ll manually shift the focus during the sequence. If you are interested in a more practical way to do focus stacks in macro photography, then you should know that there are tools called “focusing rails”, which were created with the goal in mind to help you during your focus stacking sequences.
 The tools you'll need for macro photography are different than landscape photography. Photo by: 'Pixabay'.
How do these focusing rails work? There are two types: manual and automated ones. Unsurprisingly, with the manual rails, you’ll have to move the camera along manually. Meanwhile with the latter, the movement will be made by the rail itself.
If you are curious about these rails, then you can invest a few bucks in the manual ones as they generally come way cheaper than the automatic models.
There is one more option though to be considered, in case you are not interested in the focusing rails: the Helicon Tube. Helicon is one of the world’s leading focus stacking programs. The same company has also released an extension tube that goes in between your camera and your lens. While this may not seem revolutionary, having the ability to connect to your phone and control the tube remotely with a dedicated app gives you the opportunity to decide how many shots you want to make, as well as how much to switch the focus between one shot and the next. You'll even be able to edit the focus stacking sequence in the software without encountering any problems. Sounds like a great tool now, doesn't it?
How to Shoot for Focus Stacking
The time to put the tools we talked about in the previous chapter to good use has finally come! Now we’ll see how to capture a focus stacking sequence in the field without any mistakes. Again, we’ll talk separately about landscape and macro photography, since the two genres require different approaches to focus stacking.
 The way you focus stack images for landscape is different to macro photography. Photo by: 'Pixabay'.
Landscape Photography
Let’s say that you're wandering in the mountains during the summer season and you find some nice flower-filled meadows. I'll bet that you have seen plenty of shots with captivating, big flowers in the foreground and you’d love to replicate that kind of style, right?
As an example, I’ll use one shot of mine that I took a couple of years ago at the Seceda – a beautiful location in the Dolomites.
 A series of 8 images for focus stacking. Photo by: 'Leonardo Papèra'.
As you can see, to produce the final image (which you’ll find at the end of the paragraph), I took 8-shots for my focus-stacking sequence. Let’s go through the steps now in order.
Step 1: Find the Right Composition Handheld
When you arrive in the area you plan to shoot, start looking out for possible compositions without the tripod. It will help you to see a lot more perspectives of the same scene.
Step 2: Set Up Your Gear
After you have found a composition that you like and think it’s working, it’s time to put on the tripod! It can take a few minutes sometimes to set everything up since you’ll probably be working at a weird, uncomfortable angle... generally almost at ground level.
Pro Tip: If your tripod allows you to remove the central column, go for it. It will give you more flexibility while setting up and you won’t have to deal with a minimum height from the ground anymore.
Step 3: Find the Right Exposure
After you have set up your gear, it’s time to take a few test shots to find the exposure that you want. In case you are not able to capture the whole dynamic range of the scene in a single shot, take all of the different exposures you need before (or after) starting the focus stacking sequence.
In the example above, I had to recover some of the highlights in the mountain wall and the clouds, so before that sequence, I also took a darker shot just for those elements. For these exposures, remember to keep the focus to infinity, to have the mid and background in focus.
Step 4: Make the Sequence
How? It’s easier than you’d think. Once you’ve found the right exposure, start from infinity and take as many shots as you need until the closest thing in your frame is in focus. I generally take even more than I actually need, just to be on the safe side.
For the shot above, I didn’t need 8 shots as I could have probably gotten away with 4 or 5, but you never know! It is hard to check exactly what is in focus on the camera screen while you are shooting out in the field, so it’s nicer to have a few more shots rather than not enough.
Most of the time, I don’t even look at the camera screen when focus stacking: I just rotate a small bit of the focus ring and take a sequence of 7 to 10 shots (depending on the scene), from infinity until I reach the other end of the focus ring. In my case, that's 0.28cm (on the Nikon 14-24mm). This way, by using close apertures like f/10-f/11-f/13, I’ll basically be 98% sure that I'll have everything in focus, from the furthest thing in my frame all the way to the closest object in the scene. Of course, I can’t place anything closer than 0.28cm, otherwise that subject will be blurred as the lens can’t focus that close.
Pro Tip #1: To avoid any issues during the post production phase, be sure not to change any of the settings during the sequence. It might seem obvious but sometimes, it comes naturally to correct the shutter speed, aperture and ISO. Even a difference of ⅓ stop will give you some bad headaches in post production, so be sure that all the shots have the same exposures.
Pro Tip #2: Everything that is subject to focus stacking must be in the exact same position for the whole sequence. If there is something moving in the frame, use exposure times fast enough to get everything still and sharp. Think about this: if in one shot you have a flower in a certain position and in the next one it will have moved to another position (let’s say because of the wind), you won’t be able to merge those frames together anymore.
 The final focus-stacked image. Photo by: 'Leonardo Papèra'.
Macro Photography
Let’s talk now about the more complicated process of focus stacking in macro photography. While the general process will be the same – that is, to shoot a sequence of images with different focus plans – it will be just a little bit more complex than what is necessary for landscape photography.
 Consider the number of images you might need to focus stack a macro. Photo by: 'Pixabay'.
The first thing you should consider is that the amount of shots you need to have everything in focus in a macro picture will be a lot more than the amount for a landscape picture. This is because at a magnification rate of 1:1 (or even more), the depth of field will be incredibly thin, with just a tiny portion of the subject appearing to be sharp while the rest will be blurred.
Here are the steps that you need to follow to focus stack for macro photography:
Step 1: Find Your Subject and Compose
This step works pretty much for all the photography genres and not just for macro photography. In this case though, what I mean is to find a suitable subject for focus stacking. The number one priority is that it must stay still for the whole sequence (as for landscapes), otherwise it won’t be possible to merge the photos later.
 Subjects for macro photography are all around you! Photo by: 'Pixabay'.
Step 2: Set Up Your Equipment
This is where things get a little more complicated. You might need to mount a focus rail or Helicon tube to your camera, together with an external flash, in order to highlight your subject. You may also need a light diffuser to give the scene a more natural look. All I can say is that sometimes, the process is quite straightforward as the situation doesn’t require a lot of tools whereas other times, it can be as tricky as recreating a “micro studio” in-field with flashes, rails and whatnot.
Step 3: Manually Take the Sequence
In case you don’t have any rails or a tube, manually take the sequence by rotating a small bit of the focusing ring on your lens. While in landscapes 4 or 5 shots are generally enough to complete the sequence, here you could need as many as 40 shots per series.
If you have a manual macro rail, then without touching any of the settings or the focus, just slightly move the camera along the rail after every shot. Basically, instead of changing the focus of the lens, you’ll change the distance of the camera from the subject. Let the Helicon tube or automated macro rail do their magic. In both cases, all you'll have to do is decide how many shots you might need for that specific sequence and how much to move the focus between one shot and the other. That’s it. The tube or the rail will take care of the rest by moving the focus or the camera, capturing all the shots you need.
- See also: 15 Tips for Monochrome Photography
Focus Stacking In-Camera
In the last few years, camera manufacturers have added a very interesting feature in some of their newer camera models: the ability to focus stack automatically from the device! Yes, you heard me: some of the most recent cameras (and in the near future probably all of them) will do all the hard work for you. As for the automated rail and Helicon Tube, all you’ll need to do is select how many shots the camera has to take, as well as the start and end points of the focus stack.
This feature will work only on lenses with autofocus. With older lenses, you won’t be able to automatically do the focus stacking with the camera.
- See also: Interview with Óli Haukur
How to Stack Photos in Lightroom and Photoshop
Now that you have your focus stacked sequence, what are you going to do with those shots? You’ll need to merge them all together in post production to obtain the final focus stacked image. In this chapter, we’ll go through the whole editing process, step by step, so that you can replicate it and learn how to master the technique in no time!
 Focus stacking using post-processing software isn't all that difficult. Photo by: 'Leonardo Papèra'.
RAW Adjustments in Lightroom or Camera Raw
For the sake of this article, I’ll use the same photo from earlier as an example.
The first thing you should do when starting to edit a sequence is to make the same exact RAW adjustments to all of the frames together. Remember that all the shots should look the same in terms of exposure and colours, so if you apply an adjustment, be sure that you are applying it to the entire series and not just to the single photo. Even the slightest difference will result in a problem during the merging phase.
Next, select all the frames and right click, go to “Edit In” and then select “Open as Layers in Photoshop”. Unfortunately, there is not an automated merging feature for focus stacking in Lightroom as there is for HDR and panoramas, so you’ll have to manually merge the shots together.
 Make RAW adjustments in Lightroom or Camera RAW. Photo by: 'Leonardo Papèra'.
Auto Alignment
This step will be quite easy and straightforward. Open all of the photos in Photoshop as layers. Select them all (like in the bottom-right part of the screenshot below here), go under the “Edit” section of the top bar and from there, select “Auto-Align Layers”.
By doing this, our aim is to delete any micro differences in composition or movement and to get rid of the effect called “focus breathing” – the slight change in focal length that occurs when you change the focus on your lens.
 Auto-align your layers. Photo by: 'Leonardo Papèra'.
Masking
This will be the most difficult and time consuming part. You'll have to manually mask each layer, hiding the parts that are not in focus from the other ones. The final result should look something like in the screenshot below. You can apply a mask from “Layer” (in the top bar) → “Layer Mask” → “Reveal All” (if you want a white mask) or “Hide All” (for the black mask). After you have created a mask for a specific layer, it’s time to select the brush and start hiding or showing the parts you are interested in for that photo.
If you make some mistakes, it will probably look like the circled sections in the photo below.
That’s it! After you have completed this phase, you should finally have your focus stacked picture: now it’s time to keep editing the image like you would do for every other “normal” photo.
 Mask in all the sharpest parts of your images. Photo by: 'Leonardo Papèra'.
Summary
While focus stacking may sometimes be quite stressful, this incredible photography technique is generally rewarding in terms of results. It will allow you to achieve sharpness from front to back in your images – something that you may not be able to produce in any other way.
 Focus stacking is well-worth your time to practice and master. Photo by: 'Leonardo Papèra'.
It will take you a few practices to learn how to master the technique. However, it's 100% worth the time investment! The secret here is to not give up on your first go and not to get discouraged. You just need to practice and the results will speak for themselves.
I really hope that this article has helped you to improve a little bit of your knowledge about focus stacking, or that it will have at least created more interest on your side to use this fantastic technique!
About the author: Leonardo Papèra is a landscape photographer based in Italy. You can find more of his work on his website or by following him on Instagram.
Practice your focus stacking skills in-field on this 8 Day Summer Photography Workshop in Iceland! Learn from the best photography guides as you travel through the Land of Fire and Ice.


Other interesting articles
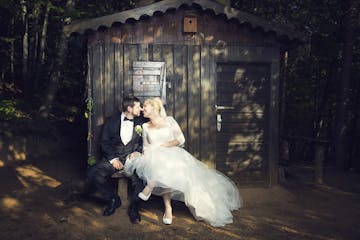

Ultimate Guide to Wedding Photography
If you are interested in photography or even work in the photography business, then you have most probably stumbled across wedding photography already, since this genre is becoming more and more pop...Read more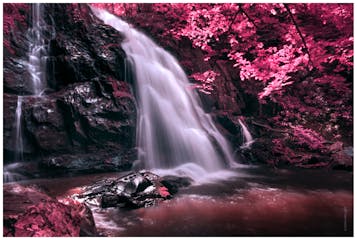
Beginner's Guide to Infrared Photography
What is a photograph? That’s a profound question. Drilling down on the definition of the word itself begs us to look at the very origins of the morpheme (yes, morpheme). Learn Everything you Need...Read more
The Exposure Triangle: Aperture, ISO & Shutter Speed Explained
What is exposure in photography? Exposure is defined as the amount of light reaching the electronic sensor, or film. In more simple terms, it is how bright or dark the scene you are capturing is and...Read more


