
Ultimate Guide to Understanding Focus in Photography

- What is Focus?
- Focus Settings on the Camera
- Camera Focus Modes
- Autofocus Area Modes
- When to Use Manual Focus vs. Autofocus
- How to Combine Camera Focus Modes with Autofocus Area Modes
- Back Button Focus
- Depth of Field
- Hyperfocal Distance
- Focus Stacking
- Focus vs. Depth of Field vs. Sharpness
- How to Use Focus Creatively in Photography
- Where to Focus
- Common Problems with Focusing and Solutions
- Low Light Conditions
- Fast Moving Subjects
- Conclusion

Focus has been one of the biggest pillars of photography since the very first day someone used a camera to capture an image. We could spend days talking about composition, settings, HDR, bracketing and plenty of other photographic techniques but without a decent knowledge about focus, none of these arguments will make any sense.
- Check out this article on Landscape Photography Settings | How to Set the Focus
- Learn all about How to Use Leading Lines for Better Compositions in Landscape Photography
To some of you, focus at a first glance might even seem like a trivial argument – something that is so obvious and easy that there is no need to write a whole article about it. However, you'll never have been so wrong! It can take photographers quite some time to really master the focus and to have a great understanding about it.
In this article, we'll talk about all the different ways that you can use focus for more successful photography, ranging from practical applications to more complex techniques. You'll have so much information about focus that you'll eventually learn how to master it yourself!
What is Focus?
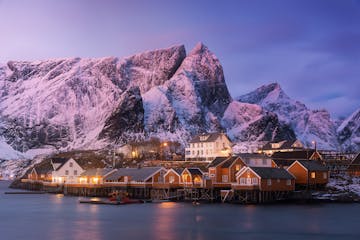
Technically speaking, focus is the result of a combination of your lens aperture and light. To make it easy, think of it like this: Depending on how light rays are converging into your lens and what kind of aperture you have selected, different parts of your image will be in focus.
 Focus is a combination of lens aperture and light. Photo by: 'Unsplash'.
Smaller apertures, such as f/8 to f/16, will “force” all the light coming from outside to pass through a tiny hole and concentrate on the image sensor. As a result, a bigger part of the image will be in focus. On the other hand, wider apertures, such as f/1.4 to f/4, will spread all the light rays on a bigger part of the image sensor. Since the hole that I mentioned a few lines above will now be much bigger, you'll end up with an image that has a smaller “depth of field” (we’ll talk more about this later).
 The aperture of your lens will determine how much light is let in and as a consequence, how well you'll be able to focus. Photo by: 'Unsplash'.
Practically speaking, you can check whether a picture is in focus or not by its sharpness. The sharper that it looks, the more it will be in focus. Be careful though, as sometimes photographers choose to highlight or hide some parts of the image through the use of focus. As such, it may be normal to see some out of focus areas as they visually enhance more of the sharp parts. I guess that’s what we call “the artistic side of photography”!
Focus Settings on the Camera
Now that you know what focus is, it’s time to put that information to good use by taking your camera into your hands and experimenting! In this chapter, we’ll take a look at how different focusing methods work and which one of them is most suitable in different kinds of situations.
Camera Focus Modes
On pretty much every camera model available on the market, you should have at least three choices when it comes to the focusing method: AF-S, AF-C and manual focus. In other words, you’ll have two different options (actually, more than two, but we’ll talk more about that later) for the autofocus, with the remaining one being the good old manual focus.
 Different camera focus modes suit different situations. Photo by: 'Unsplash'.
AF-S (Single Shot)
AF-S is an autofocus mode which allows you to lock the focus on the subject you’ve chosen. From there, you can move and recompose the photo as you wish.
The single shot autofocus is an ideal way to capture still and slow moving scenes. It is a faster way to focus on a subject, making it inherently quicker to capture a shot. AF-S works perfectly with street photography, portraits and event photography, just to name a few genres. It's a good choice for scenes where you have the time to refocus between one shot and the next.
However, it is not ideal for fast moving subjects, which is where AF-C comes in handy.
AF-C (Continuous Autofocus)
AF-C fills the gaps of the single shot autofocus. By choosing the continuous autofocus mode, your camera will automatically refocus on your subject each time it moves, as long as you keep the shutter button halfway pressed.
This focusing method works well with fast moving subjects. Given that you’ll never lose the focus on your subject, you can follow and track it without having to refocus every time you take a shot. Sports photography, action photography and wildlife photography are just a few of the genres where continuous mode is a really popular choice for focusing and can make a huge difference to the sharpness of your final images.
Manual Focus
The last focusing method of this list happens to be also the oldest one of them all: the manual focus. In this case, there are no camera processors, no autofocusing motors or any other external help. It will be just you and your ability to achieve the right focus in order to capture a perfectly sharp subject.
Still life scenes are generally the situations that suit the use of manual focus. It works even better if you are able to use a tripod. Landscape, studio and macro photography are some of the genres where manual focus shines. What do they have in common? These are all photography genres where you will have the time to check if you've managed to achieve the right focus and, if not, to re-focus again.
Autofocus Area Modes
Now that we've had an overview about the various focusing methods, it’s time to talk about the different areas that you can select when using the autofocus. All of the most recent cameras on the market will give you at least three choices when it comes to autofocus areas: the single point autofocus, the dynamic area and the auto area autofocus.
Single-Point Autofocus
Take a look through your viewfinder. When the single-point mode is chosen, you’ll be able to select just one small rectangle out of the many that are present within the focus area. This is generally the most precise way to focus on your subject, especially if it covers a small part of the frame or if you want to focus on a particular part of it (for example, the eyes).
 Single point autofocus is great for when you want to focus on a small part of the frame. Photo by: 'Unsplash'.
Dynamic-Area Autofocus
By selecting the dynamic area mode instead of the single-point mode, when you look at the scene through the viewfinder, you’ll see multiple focus points selected at the same time – not just one. The number of the selected points will mostly depend on your camera’s autofocus capabilities. Some cameras will give you more than one option for selecting how big that area is, ranging from 8-focus points to 21-focus points and so on.
This autofocus mode works well when you are shooting big subjects or if you want to have wide areas of the frame in focus. It's not the best option when precision is required. The single-point AF will work better in those situations.
Auto-Area Autofocus
As the name suggests, this is the most automated way to autofocus, since the camera will not just limit itself to focus but it will also choose where to peak the focus! This may sound super cool and easy but the truth is that it has a few annoying limitations.
In low-light situations, the autofocus function on your camera will struggle. When it has to also choose the area on which to focus, it may not be able to locate a focus point at all. In low contrast conditions, where the main subject does not stand out from the background, your camera may have some problems choosing the right focus.
Personally, I’d recommend using this auto-area autofocus only with fast moving subjects in good lighting conditions, where you won't have the time to select the autofocus point (or area) by yourself and will instead have to rely on your camera.
When to Use Manual Focus vs. Autofocus
Each focus method will best suit just a few photographic genres. Generally, we use manual focus for static scenes – the ones where you have time to settle down and refocus if there’s the need. Meanwhile, we use the single-shot autofocus for slow moving scenes and the continuous autofocus for fast moving situations.
 Choosing a focus mode depends on how much time you have to focus. Photo by: 'Unsplash'.
As you may have understood by now, the main variable when it comes to choosing the right autofocus mode is the time that you will have at your disposal when taking a picture.
- See also: 15 Tips for Monochrome Photography
How to Combine Camera Focus Modes with Autofocus Area Modes
Could you imagine shooting an automotive race with manual focus? I think we can all agree that it would be close to impossible to peak on the right focus. On the other hand, think about doing a focus stack in macro photography with the continuous autofocus. You might go crazy having to select the exact focus point each time. Most likely, the autofocus wouldn’t peak on the right spot by itself.
Read on for a few tips about which focus mode and autofocus area will be better to use in certain situations.
Landscapes/Architecture
The last time that I checked, landscapes and buildings don’t move. Even when there are dynamic elements in your frame such as clouds and waves, you’ll usually have enough time between one shot and the next to refocus in case something has gone wrong with the previous image. That’s why in landscape and architecture photography, manual mode or AF-S is generally recommended.
Still People
This relates to portraits and a few street photography situations. Which focus mode you’ll have to use will mostly depend on how much control you have over the situation.
 If you have your own model, then it is best to use manual focus. Photo by: 'Unsplash'.
If you are shooting in a static environment with your own model, then you may as well use the manual focus to peak the best point in the frame. If you don’t have much control over what you are shooting, then you'd better choose the AF-S mode with the single point or dynamic area modes selected, depending on where your subject will stand in the photo and how big it will be.
Sports
Most of the time when you're shooting any type of sport or action scenes, you’ll have to use the AF-C (continuous autofocus mode) with the dynamic area or auto area modes, depending on how fast your subject is moving. That’s the best way to shoot sports!
 Sports requires continuous autofocus for the best results. Photo by: 'Unsplash'.
Back Button Focus
The back button focus is a smart trick underestimated by many photographers. You'll generally find this button near the viewfinder on your camera, as in the photo above.
 The back-button focus. Photo by: 'Leonardo Papèra'.
How do you generally autofocus? By half-pressing the shutter button, right? Then, if you get the focus right, you press a bit more and take the shot. The back focus button basically does the first part of the aforementioned process: you’ll be able to separate the focus and capture operations. This way, if you want to maintain the focus locked on the subject, you won’t have to change the focus points every time you recompose the shot. All you'll need to do is to press the back button once to block the focus.
Depth of Field
Depth of field is one of the major concepts that you'll need to understand within the universe of photography. Knowing what it is will allow you to improve your skills and to produce better photographs.
To understand what the depth of field is, we'll need to talk first about the “focal plane”. This is the point of focus within your frame. Imagine your picture in three dimensions: you’ll be able to select many different focal planes in there.
Now, let’s talk about the aperture of your lens. At wider apertures, since the light rays are spread all over the sensor, you won’t be able to put many focal planes in focus. The opposite will happen when you use smaller apertures.
In photography terms, using a wider aperture will result in a narrow depth of field, while small apertures will result in a big depth of field. It may feel counterintuitive at first but after a while, you’ll get used to it!
Put simply, depth of field refers to the amount of focal planes that you can get in focus given a specific aperture.
- See also: Depth of Field in Photography
Hyperfocal Distance
The hyperfocal is a specific focusing distance where you’ll have all the objects from half that distance to the background appear to be sharp enough. This distance changes every time that you modify the aperture of your lens and/or change the focal length at which you are shooting. If this sounds tricky, there's no need to worry. There are plenty of hyperfocal calculators both online and in app stores, so you won’t have to do the maths each time. You can simply refocus at the distance given by the calculator.
Hyperfocal distance can be useful when you are shooting in low light conditions but still need a big depth of field (e.g. night photography). Some photographers believe that the hyperfocal distance is some kind of magical technique that will give them the “power” of having everything in focus, from the close foreground all the way to far-off things in the distance – in every possible situation and at all times.
Let me give you the bad news: it doesn’t work like that, unfortunately. Don’t get me wrong, hyperfocal distance can come in handy when focusing but to give you an idea of how often you might use it – I have not used this technique once within the last 5 or 6 years and I've taken quite a few pictures in this window of time!
Focus Stacking
In case you aren't able to get everything in focus with the hyperfocal distance (or you don’t feel that it’s sharp enough), focus stacking could be the solution to your problem. It's a more complex but helpful technique that consists of taking multiple exposures with different focus points, which you then merge together in post production. Read more about this technique in our Ultimate Guide to Focus Stacking.
Focus vs. Depth of Field vs. Sharpness
To sum up what we’ve learned so far: the three main subjects of the article are focus (obviously!), depth of field and sharpness. We've talked quite a lot about the first two, while I've barely mentioned sharpness so far, so let me explain why.
Focus is an objective measurement. Whether a picture is in focus or not, there is no such a thing as “it’s in focus, in my opinion”. Focus refers to the spot within the frame that is of maximum sharpness.
Depth of field too, even if it’s a bit more complicated that the focus itself, is still an objective measure. You can calculate it in terms of numbers, even though it may be difficult to do in-field while being easier to naturally perceive where it starts and where it ends.
Sharpness is the least objective measurement out of the three. That's because while we may perceive a photo as sharp or not, there is no actual way to precisely measure the sharpness of an image. Let me give you an example to explain myself better.
When observing a photo with a large depth of field (e.g. a landscape), our eyes instantly look for sharpness throughout the frame. We wouldn't be pleased to see the foreground slightly blurred or to have the background not be razor-sharp. In a case like this, we generally look for an equal degree of sharpness everywhere in the frame.
On the other hand, try looking at a portrait photo taken with a really wide aperture. Only the most important part of the frame (e.g. the eyes) are usually in focus, while the rest is often blurred. We might still find this image to be aesthetically pleasing and consider it to be razor-sharp, even though 95% of the image might be out of focus. In fact, the out of focus parts of the picture may even give us the feeling that the area where the focus point falls looks sharper than it actually is. As you can see, sharpness is mostly subject to our own perception.
A very general and somewhat inaccurate statement can be that the more a picture is in focus, the sharper it will look. When you gradually move out of focus, it will become less sharp. The larger the depth of field a picture has, the less sharp it will look, while the opposite will happen with a narrow depth of field. Again, take this as a brief and simple way to explain the correlation between these variables!
How to Use Focus Creatively in Photography
At this point of the article, you should have a decent idea of what focus is and the different ways of focusing with your camera. You will also have a basic knowledge of how depth of field and hyperfocal distance work.
Now, it’s time to put all of these ideas to good use in practice! So let's take a look at some ways that you can use focus creatively in different photography genres.
Where to Focus
No matter what type of photographs you like to shoot, stop and think about the huge power you hold when you choose where to peak the focus in the frame. It is not just a matter of sharpness. When choosing the focus point, you will also choose where you want the viewer’s attention to fall. It’s like saying, “Hi, I want you to look here!”
Alternatively, it’s also a good way to hide unwanted parts or objects within the frame. By selecting a certain focus point, you can concentrate the viewer's attention on something else.
This is actually the most important thing about focus in photography: the ability to direct where you want the viewer’s attention to fall, simply by highlighting and blurring parts of the image.
Landscape Photography
One of the very first notions you’ll learn when you first immerse yourself in the world of landscape photography is that using small apertures will allow you to get everything in focus. A few examples would be f/8, f/11 or f/16.
While this may be true, it’s not the only way to shoot landscapes. Take a look at the image below. In order to create that soft bokeh in the foreground with the flowers, I had to use f/4, which is a quite wide aperture.
 A wide aperture was used to create bokeh in the foreground. Photo by: 'Leonardo Papèra'.
Now take a look at the picture below. Even with a small aperture, I couldn’t achieve the full depth of field in a single shot, so I had to use the focus stacking technique.
 Focus stacking was used to get everything in focus with this shot. Photo by: 'Leonardo Papèra'.
These two examples are just a couple of artistic ways that you can use focus in landscape photography!
Portrait Photography
If one of the first things you learn in landscape photography is to use small apertures, with portrait photography it's generally the exact opposite.
To achieve the bokeh effect, you’ll have to use very wide apertures. Unfortunately for us, the best lenses for bokeh happen to also be the most expensive ones on the market! You’ll see a huge difference between a shot taken at f/4 (or f/3.5) and one taken at f/1.8 (or even f/1.4). The classic way to focus on your subject is to select the focal plane of their eyes. If you want to try something different, then perhaps give some attention to other parts of your model’s body, such as their nose or their ear.
 Focus on the eyes with portraits or some other important part of your subject's body. Photo by: 'Unsplash'.
Another way to shoot portraits is to place your subject in a wider context, such as a landscape, and capture everything in focus. You won’t get the bokeh effect but you'll be able to give the sense of scale in an otherwise “empty” landscape.
Wildlife Photography
Bokeh plays quite an important role in wildlife photography, such as it does in portraits. The only difference here is that wide apertures are, more often than not, the only possible way to capture the shot and not just an artistic choice.
Wide apertures will let more light hit your camera's sensor. As such, you’ll be able to use faster shutter speeds. That means not having to deal with blurry or shaking pictures. When you get bored with focusing on an animal's eyes, you can try refocusing on different parts of its body or even the area around it. Use this technique with care though to ensure that the shot will still have a meaningful and visually pleasant composition.
 You may have to use wider apertures to capture wildlife. Photo by: 'Leonardo Papèra'.
Another focusing technique that you can use for wildlife photography is to get down low at ground level, placing some kind of foreground between you and your subject in order to give more sense of depth of field, such as in the image below.
 Get down low and use the foreground to give a sense of more depth of field. Photo by: 'Leonardo Papèra'.
Reportage
Reportage is one of the trickiest genres when it comes to choosing the right place to focus; there’s not a right or wrong way to focus like in some of the more “conventional” types of photography, nor is there a more artistic way of focusing. The only thing you need to concentrate on when you are doing reportage is the narration of the story. Think about what kind of story you would like to tell with that picture. This will help you to decide who or what should be the main subject, so that you can work out what should be blurred and what to have in focus. There may be times when you'll want to have equal sharpness throughout the scene, to attribute all of the elements with the same level of importance.
 Reportage photography is about telling a story. Photo by: 'Unsplash'.
Focusing in reportage photography is like recording a movie. You'll have to create (or find) a story and narrate it through the focus points in your pictures.
Still Life
A couple of the things that matter the most in still life photography are textures and patterns. By placing emphasis on these, you can create strong visual impact and attract the viewer's attention. Capturing still life images is all about focusing on the right point and using the bokeh effect to your advantage. This way, you'll be able to enhance the patterns and textures to improve your compositions.
 Still life scenes are all about using bokeh to your advantage. Photo by: 'Unsplash'.
With still life scenes, your subject doesn't move, so you'll have all the time in the world to try shooting with both small and wide apertures. This will give you a better understanding of which ones work better with certain compositions and subjects.
Common Problems with Focusing and Solutions
Sometimes, focusing will give you a hard time. I’m not just referring to the autofocus but also manual focus, which is difficult to achieve under certain conditions. So here are a couple of tips for when you can't manage to get the focus right!
Low Light Conditions
One of the most common situations where focusing isn't easy is when you are shooting with low light. Some cameras and lenses will perform better than others but they will all fail below a certain degree of light. Cameras just aren't able to autofocus in darkness and neither can you!
 In low light conditions, your camera may fail to autofocus. Photo by: 'Unsplash'.
Live view comes in handy in these situations. You’ll be able to zoom into the scene when focusing. If it’s too dark and you can’t see a thing in the Live View of your camera, then you might want to light up some of the subjects with a headlight, torch or lamp. You can then check the Live View again to see if you are able to properly focus.
Fast Moving Subjects
We already spoke about this earlier but fast moving subjects are often a pain in the back to focus. The best possible way to frame them while getting the focus right is to use the continuous autofocus with the auto-area mode selected. If you are standing still with your camera, then choose the dynamic area mode so that you can track and follow the subject by moving your camera.
 Fast moving subjects such as flying birds may be difficult to focus on. Photo by: 'Unsplash'.
Conclusion
Many of the mistakes that we all make while shooting in-field are able to be corrected. This includes when we get the exposure slightly wrong or if we end up with noise from using a higher ISO. However, focus is not one of those things that we can fix in post-production. You'll either have a good focus or you won't – there’s no such thing as being able to correct it later. If you get the focus wrong, then you'll either have to take the photo again or you'll be done. As such, understanding how to properly focus and which focus mode is the best to use in each situation is very important.
I hope that I've given you enough information about focus in photography so that you'll be able to improve your ratio of capturing images in focus from now on!
About the author: Leonardo Papèra is a landscape photographer based in Italy. You can find more of his work on his website or by following him on Instagram.
Practice your focusing skills in-field on this 8 Day Summer Photography Workshop in Iceland! Learn from the best photography guides as you explore the Land of Fire and Ice.


Other interesting articles

Ultimate Guide to Seascape Photography
Seascapes are one of the most challenging types of landscapes that one can capture. Why? Because it’s easy to capture a good seascape, while it’s really, really hard to capture a great one. Learn...Read more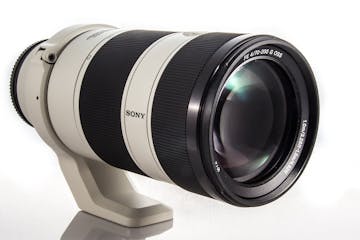
How to Minimise and Clean Camera Sensor Dust
The world can be an unpredictable place. One second, it’s completely calm, then the next there are storm and weather warnings issued by the local authorities for severe wind all over the place. Apar...Read more
Photographing Waves in Iceland | In Field to Post Processing
Do you like seascapes? How about photographing the flow and motion of the waves? Yes? Read on to find out all about photographing the ocean's waves in Iceland. Join us on this 11 Day Iceland in Au...Read more


